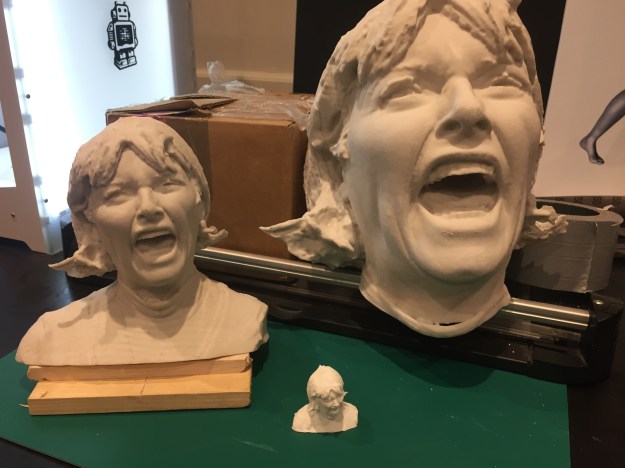
I have assembled the head of Theresa, the Optician’s wife. Just the shoulders to go. I collect the remaining parts from CSM on Monday. You can see the size difference below. The smallest is a three hour 3D print using my Ultimaker 2+ Extended printer. The medium version is printed in one piece at CSM and is 19 cm tall. The largest version is the one I am assembling now. It was meant to be life size, but it is in fact slightly larger than that at 40cm tall when fully assembled from 10 parts. Each batch of parts takes about 15 hours to print. It took several batches, but I am unsure exactly how many.
The assembly process is not as straightforward as it might seem. This is due to shrinkage and warping during the printing process. Whilst this is minimal for two parts, when joining several together, the problems arise. I had to flex some parts to make them fit. I also had to infill gaps and major height differences. Then sand. Due to differences in plaster colour, arising from batch changes when 3D printing, and others due to filling with a whiter plaster, I will also probably need to paint the finish sculpture.


After a 15 hours false start and another 159 hours of 3D printing using my Ultimaker at home, I have now printed the main face of the refugee (Leo), shown as a 3D image in Cura on my earlier blog. This is one of 9 parts, but the largest.


However, I must have done something wrong as the scale is not as intended. It is meant to be life size, but it is not. You can see that Leo’s head is only about the same size as the medium size version of Theresa. It also has some imperfections. These could have been avoided if I had asked for a support structure in Cura, the 3D printing software for my Ultimaker. This would have taken 17 days of continuous printing at high quality, even at this size. So I tried to do get by without the support structure. I had to intervene a couple of times to provide a makeshift version of my own when printing came to dips such as the eye sockets and ears, which had filament hanging in the air until I did something about it. Even then, these areas are very thin or a bit of a shredded mess.


So with Leo I have sadly decided that I cannot make a life sized bust in bronze. The best that I can do is 3D print Leo large in parts at CSM, and then reprint his face with my Ultimaker to match the size as close as I can. The latter could then be used to make an unpolished bronze face to attach to the rest of the bust in white plaster. This approach presents its own challenges.
The first challenge is to take the face I have already printed to the Foundry workshop and ask Becky where I should put the runners and riders, and at what angle. The second challenge is to learn a 3D software feature to add the runners and riders to the 3D file of the face. The third challenge is to print the face the right size this time. It will probably take at least 50% more time, namely about 10 or 11 days of continuous 3D printing using my Ultimaker, or a month if I add a support structure, which I will probably need to do with runners and riders hanging in mid air. The fourth challenge is to clean the 3D printed face up. I have ordered some sculptable wax like specialist material and tools to do this as the PLA filament used for the print is too inflexible.


The fifth challenge is to finish the cleaned up 3D printed face by adding extensions to the runners and riders (as complete lengths will be outside the Ultimaker printer bounding box), and then encasing the whole ready for the foundry lost wax process. When the bronze is poured the original PLA face will no longer exist (hence ‘lost wax’). I will then have to break the bronze face out of the mold, and clean it up, removing the runners and riders with a power saw and grinder. The sixth challenge is to see whether the bronze face fits with the rest of the plaster sculpture, and if it does, to bond the bronze and plaster together. All this effort involves taking risks, and a lot of time!! My back up plan would be to consider just 3D printing the face in a bronze type PLA and not taking it through the foundry process. If this did not work then I would use the face printed in plaster at CSM. I will need to make a decision about which route to take, and I will seek advice on the aesthetic result from Jonathan, and then consider if I have enough time to proceed with either of the bronze or pseudo bronze face options.
I collect a 20cm tall head of the refugee printed in one piece, and the parts for the life size bust from CSM Digital Fabrication on Monday 28th April. I will keep you posted.
