Monthly Archives: October 2015

First Crit Tutorial


The range of projects our on-line group are undertaking is amazing. I do not quite understand some of them but no doubt all will be revealed during the course of our studies and conversation. For example, to quote a passing comment in this tutorial, ‘I just pushed to the CDN, so hopefully it has updated the interwebs’ is sadly meaningless to me, but obviously enlightening to Jonathan and perhaps to all of my fellow students.

It reminds me when I first started a long career in IT – whenever my colleagues went to the pub after work all I could understand during their conversation was the in between bits like ‘the’ or ‘therefore’! But I got there in the end and no doubt eventually in turn confused a lot of other new recruits with my own IT jargon, so I guess I will get there too with digital art speak.

David’s work is concerned with hybridity. For my benefit I quote his explanation: hybridity is ‘the marriage and blending of different worlds and exploring the anxiety and/or harmony that can be produced: the ground vs. the figure; execution in digital vs. analog medium; abstract hard-edged geometric chromatic color fields vs. multi-colored textured grounds’.

He showed us some recent work which involved using his own code to turn his doodles, or weaved yarn into a digitally textured pattern, and even turned one into a new art brush for Adobe Illustrator. He uses Drawbot to achieve this and Patrick suggested he could also use SketchApp. Finally David applied Adobe Illustrator to amongst other things manipulate the image to produce his finished work. Affinity designer was suggested by Jonathan as a much cheaper alternative to Illustrator, and Leonie thought that you would get even better finished results with Photoshop. So that’s at least most of my group that deeply understood what was going on. The words used, which began by creating a barrier to my understanding, however become much clearer when I saw the work. Very clever stuff.

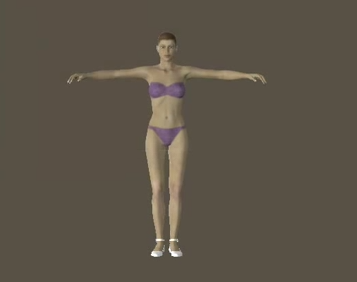
I was up next with ‘Giving the model a voice’. Please see my previous blog for an explanation which I won’t bore you with now by repeating here. I very much go along with Prof Paul Coldwell’s approach to communication. When starting his recent lecture to all the Camberwell MA students he said (I paraphrase) that he prefers not to use the specialised vocabulary and phrases of  art academia. So please forgive me if I follow his example (I am not sure I could do otherwise).

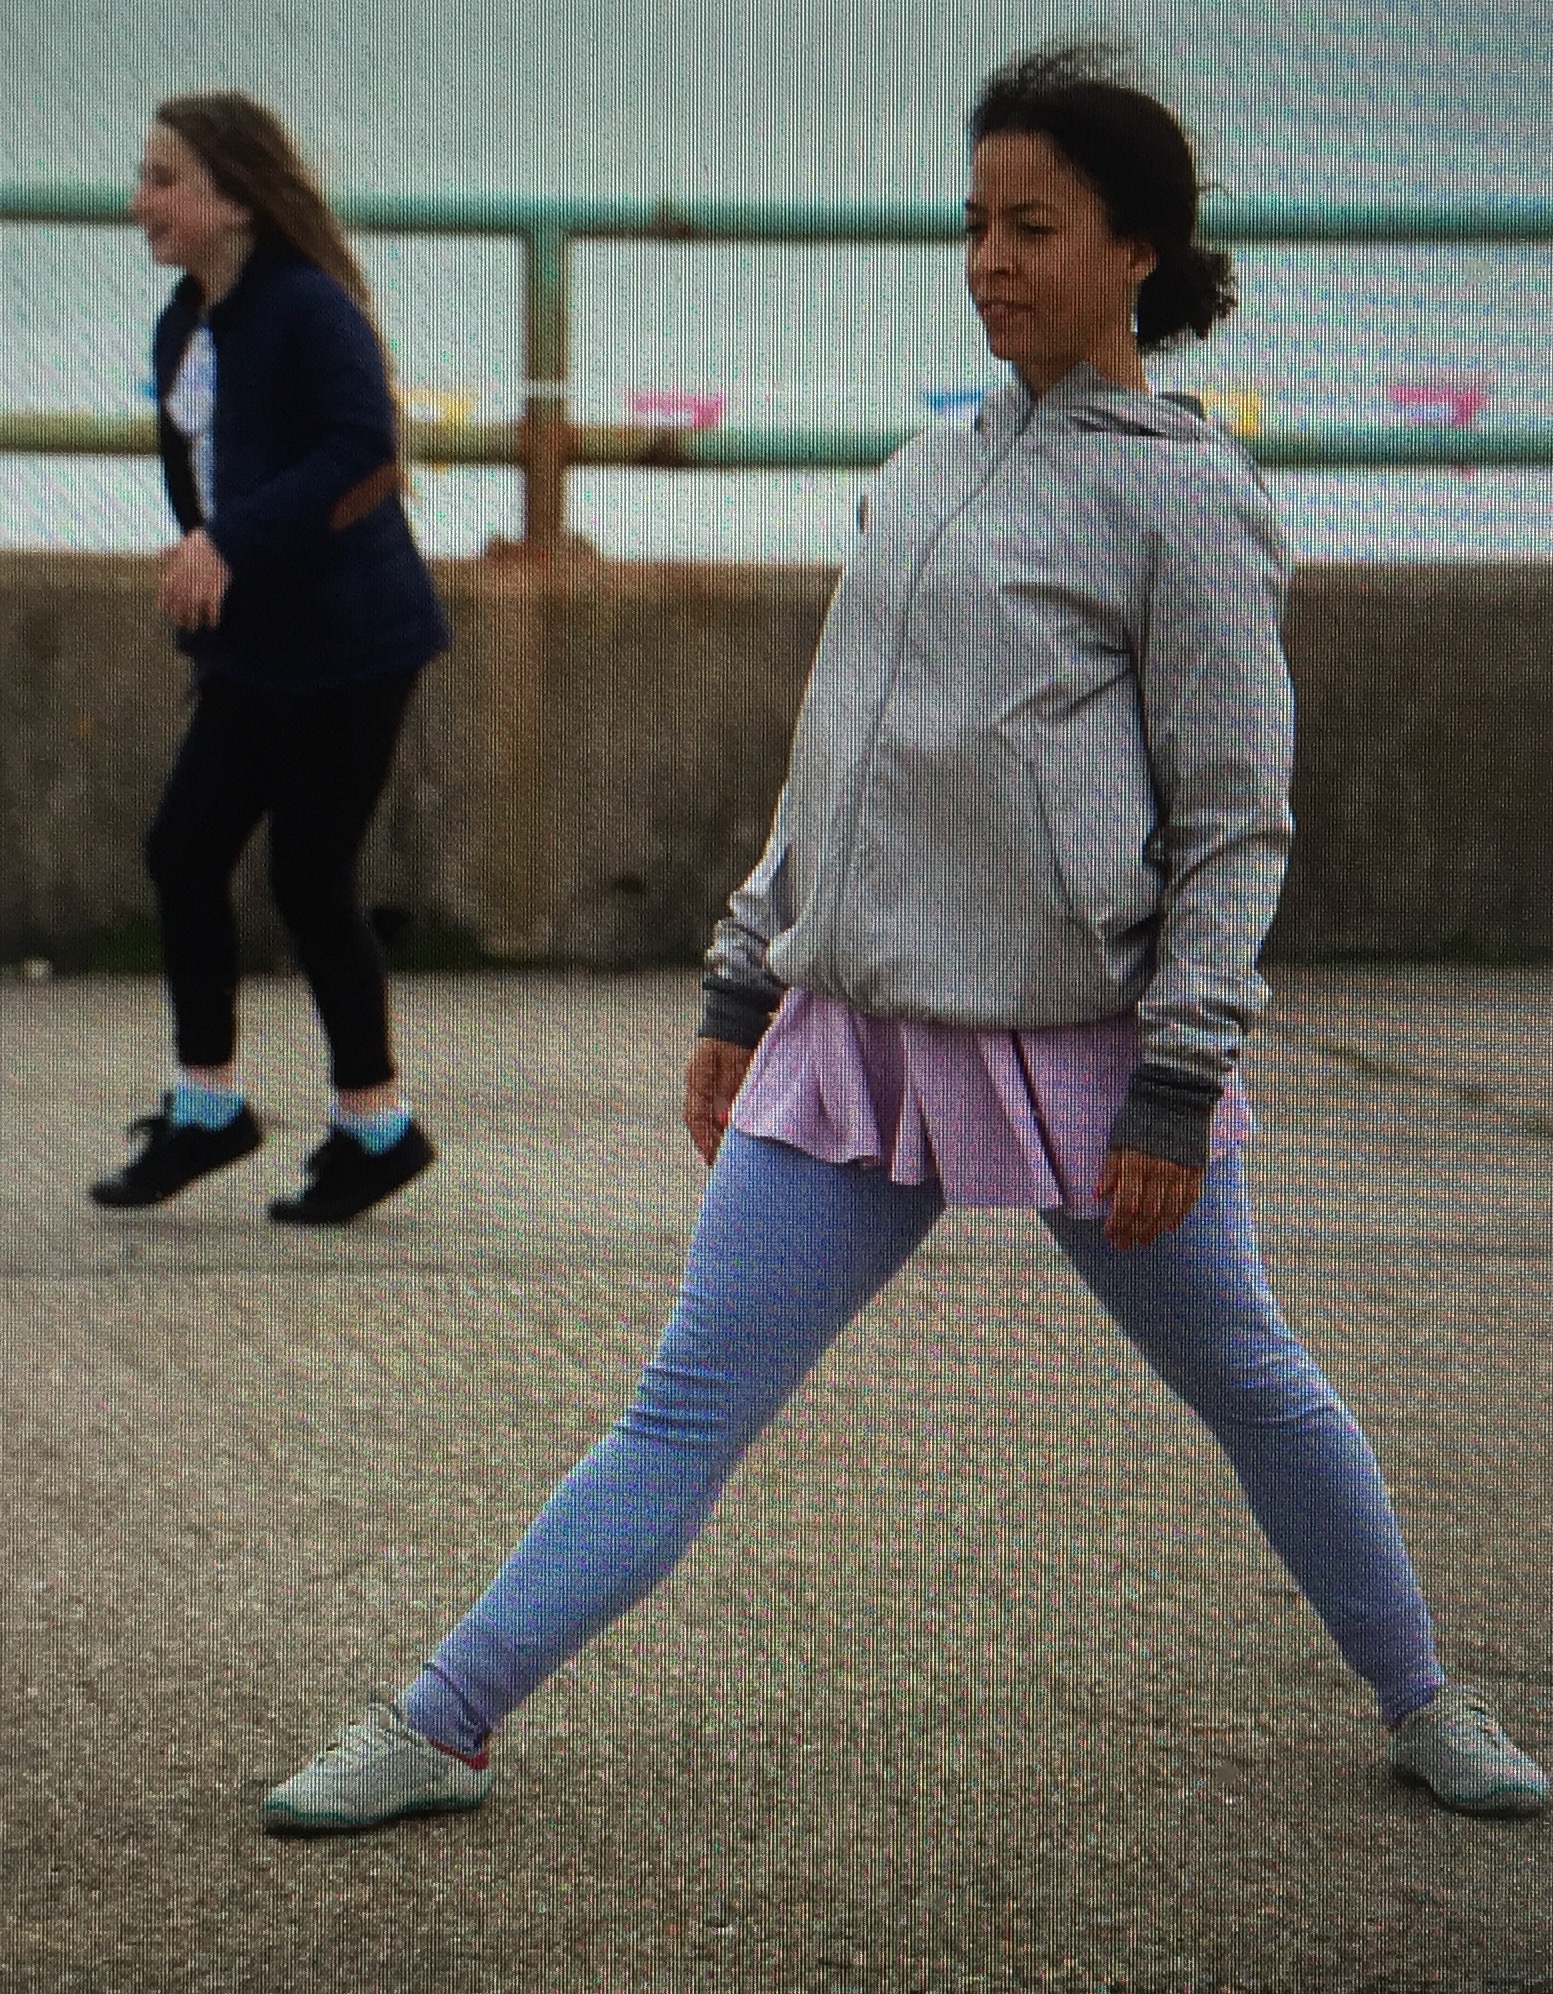
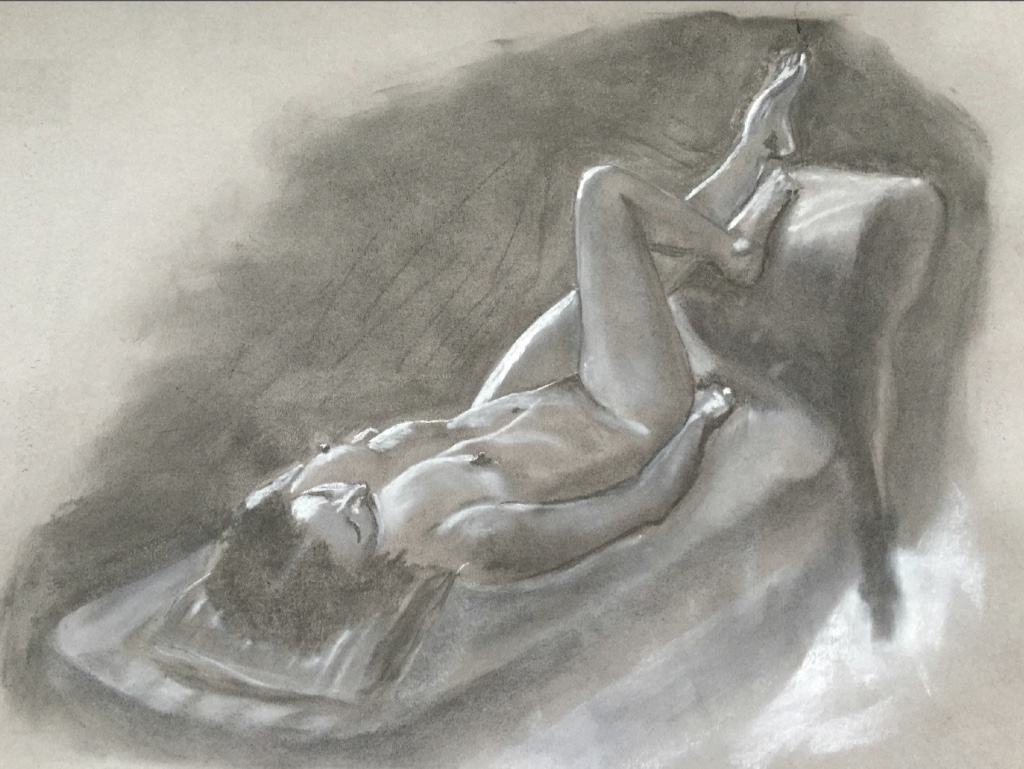
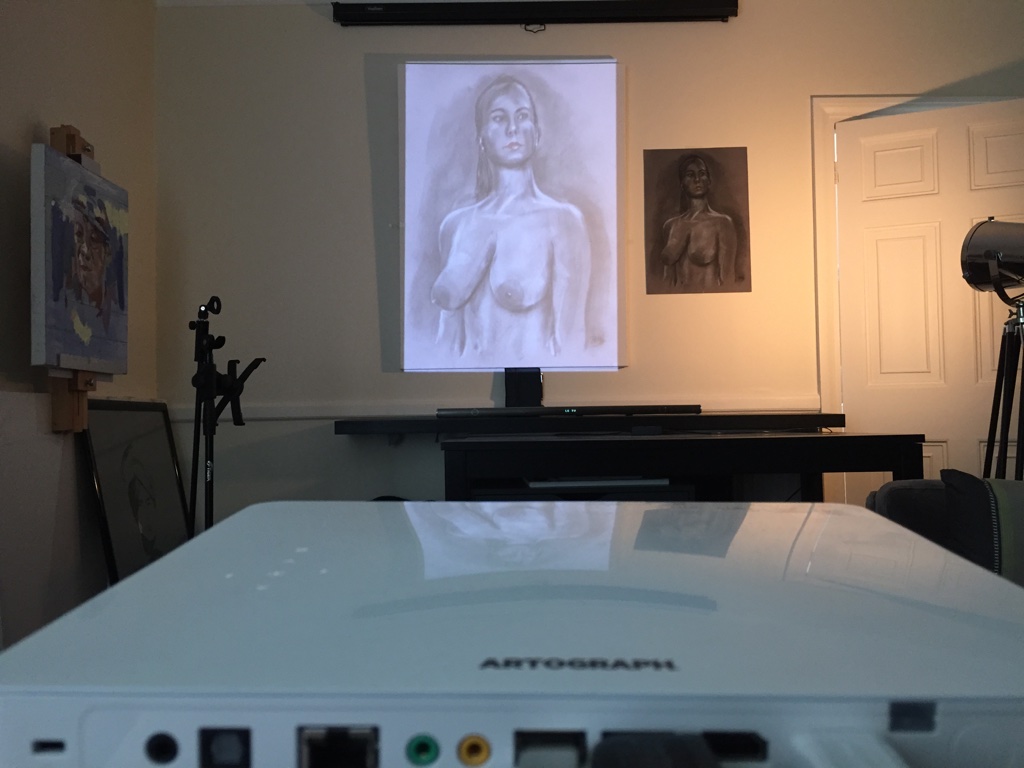
I received a lot of feedback about the viewer touching parts of the body in my painting.

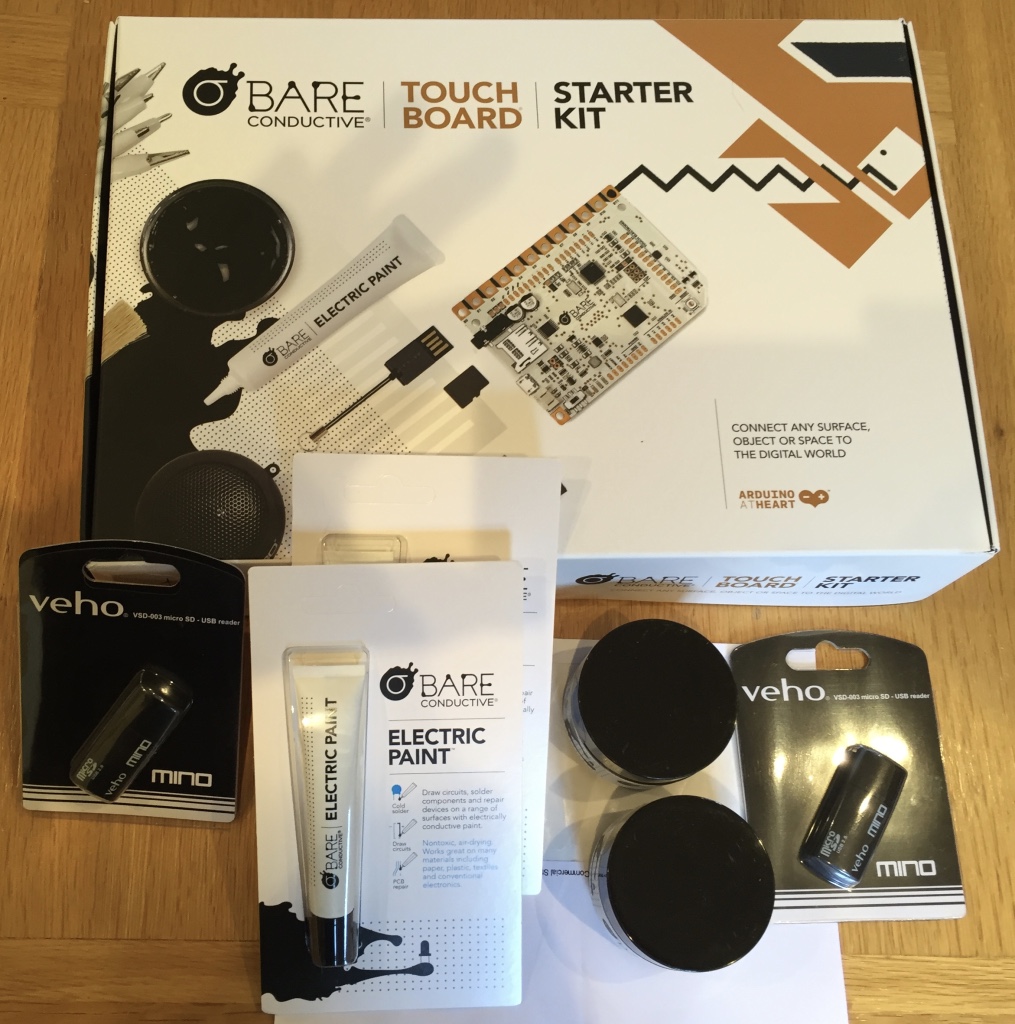
David raised the interesting prospect of a random narrative by touching the same part of the picture. If I was as familiar with coding as David, Patrick and Leonie perhaps I could attempt this good idea. However I have deliberately chosen the BareConductive touch board because it does exactly what I originally proposed without coding. Later Leonie said that it had taken her several months to get to grips with Processing in order to do her work. Perhaps for my final exhibition I may have conquered Arduino programming enough to be in a position to adapt this piece of work to use a random narrative.

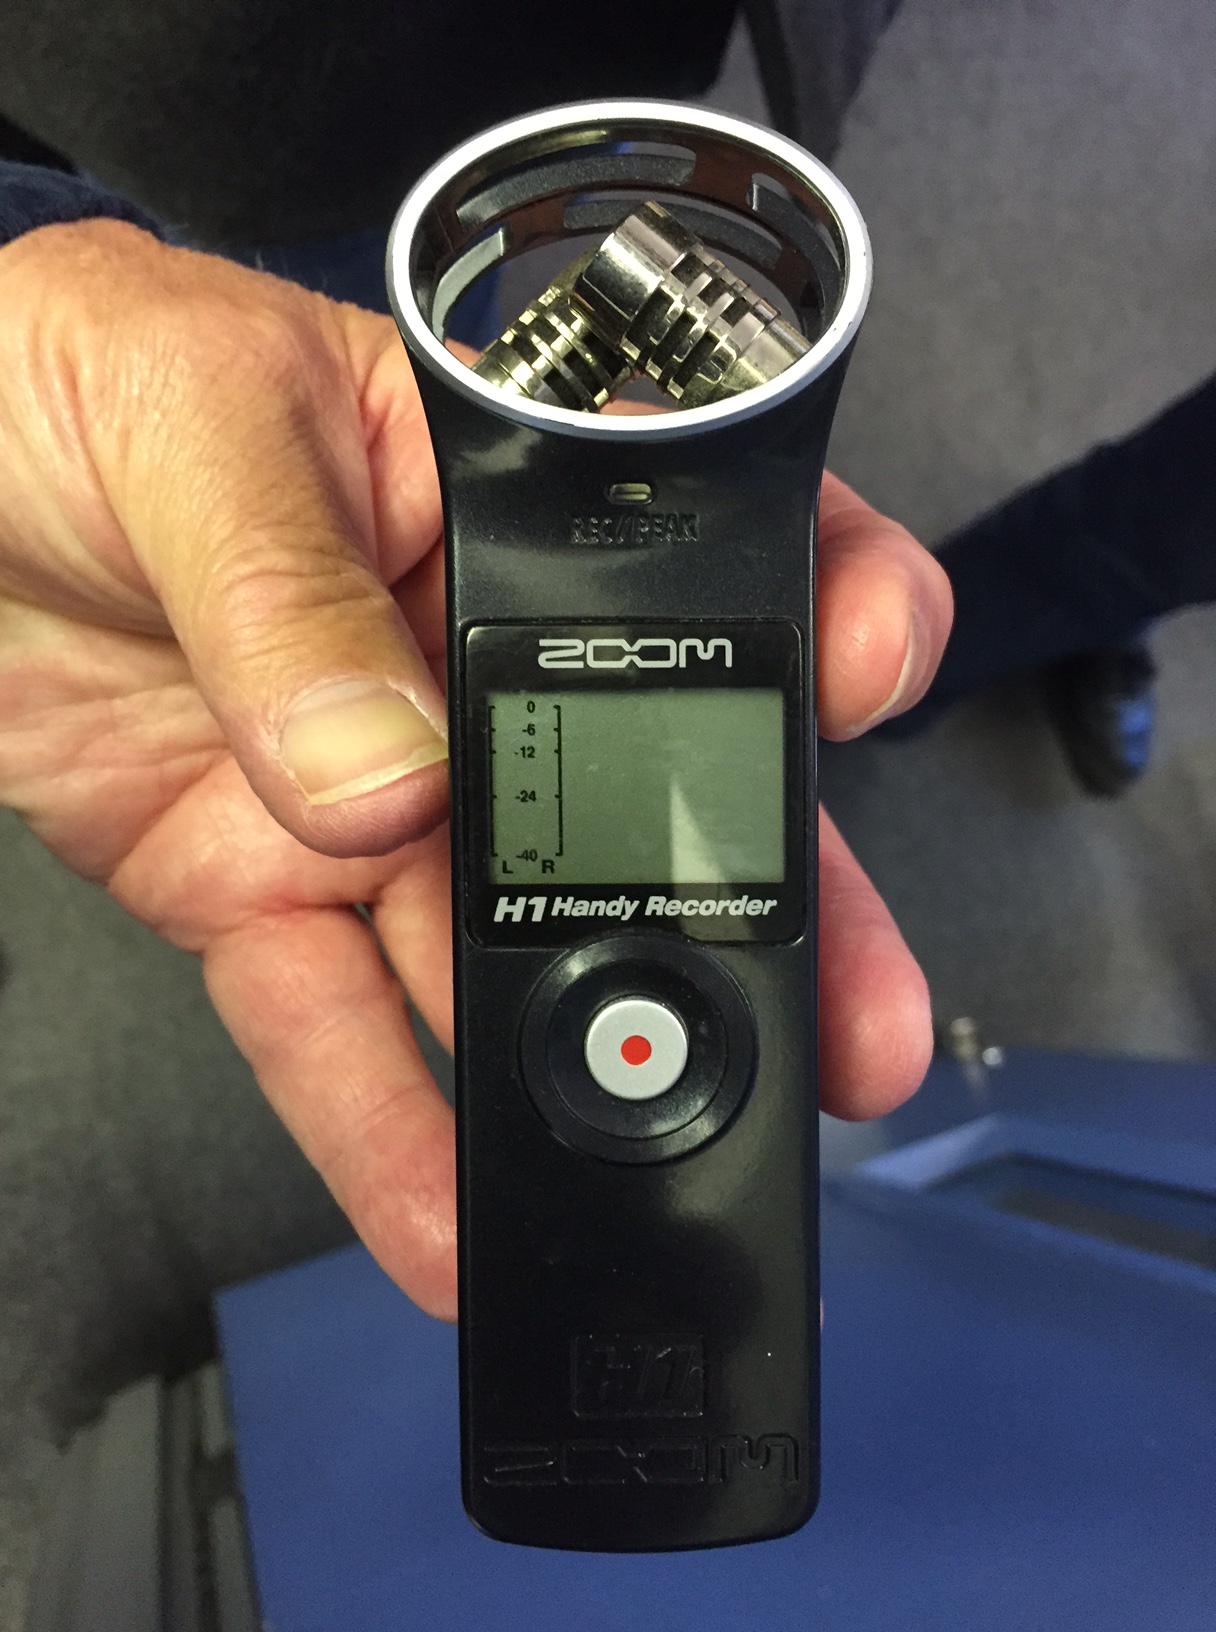
Jonathan offered some welcome comments on the zoom H1 audio recording device I have chosen which he said is very good and very easy to use. I can also easily plug in a cheap ‘Lavalier mic’ into the zoom H1 and place it near to the mouth to pick up the more focused sound of Vanessa’s voice that I am looking for.

Leonie and Katerina were very interested to see how I connect what my model says to what area is touched (although David suggested that the touch board can operate at a distance). I had not thought of that, but it depends whether Vanessa picks up on this in her narrative. Perhaps I will mention this to her. Leonie also helpfully suggested a book – The Senses of Touch: Haptics, Affects and Technologies to help research about the connection between the recordings and the body parts.
                                                                                                                                                                       
A Sense of Touch
                                                                                                                                                                
I said that I was used to drawing rather than painting, and both Leonie and Jonathan raised the question of whether I am sure I want to ‘paint’ in a different style to what I am used to? Leonie
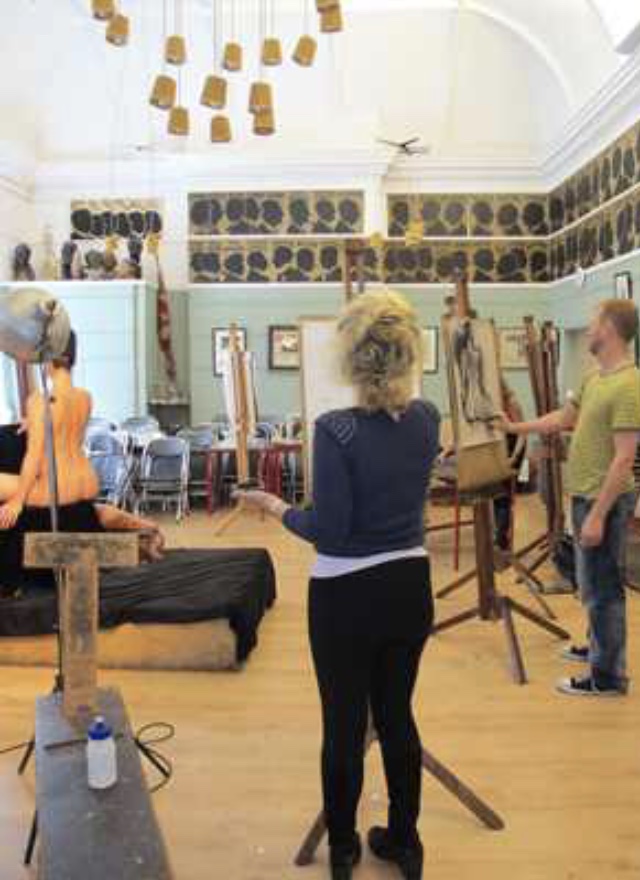
thought that my charcoal sketches would be very tactile and maybe they could be allowed to be ‘touched’ too, even though she might smudge the painting and get charcoal over her fingers! That is resolvable but charcoal is not a good conductor of electricity and that is why I am using a derivative – conductive black paint. It may be different if I was drawing in graphite which is very conductive but this will not achieve the effect I am trying to produce particularly at a life size scale. Jonathan suggested using conductive paint over a photograph. A good point which I may have to resort to if I fail in my attempt at painting Vanessa in a minimalist style following guides for my mark making in black and grey tones on a white canvas with the help of my digital art projector. This should hopefully make this painting easier for me. I am determined to try.
                                                                                                                                                                
Patrick’s current exploration is ‘of what nowadays constitutes an interface?… and of taking various inanimate objects or physical elements across the threshold into the digital realm’.
He has made a perspex (deliberately chosen so you can see through it) box of earth. When you press on it it generates one of hundreds of numbers, which can, using a microprocessor such as an Arduino, produce many different sounds or images. He also did something similar with leaves, touch and sound but on a small scale which he wants to enlarge by including other parts of the tree each with their own speaker eventually to fill an entire exhibition space. All I can say is WOW!
                                                                                                                                                                
I have yet to complete this blog with Sarah and Leonie’s work, both of which are extremely interesting and so different from that of everyone else. I also can’t wait to hear about Katerina’s too which because of time had to be held over to next week.

Starting My First Digital Project – Giving the model a voice

This first project is one of a series showing the progressive adoption of digital technology in my life drawing practice. ‘Giving the model a voice’ aims to make the model part of the work not just the object of it. Instead of silence during the pose, and when the viewer sees the work, my aim is to literally bring this drawing to life by the inclusion of the model’s narrative in her own voice and thus her personality into the picture. Her name is Vanessa and she is a classical dancer.

Vanessa

Vanessa will record her thoughts and feelings before, during and after the modelling session. She can say anything she likes. Perhaps, mentally adding things to her shopping list while she poses, or berating her boyfriend in her head for forgetting her birthday, or going through steps in her mind for her next dance performance. The plan is for an everyday narrative, not a serious statement. But it’s up to Vanessa to decide how she wants to portray herself in the artwork (and she will be jointly credited for it, alongside myself as the artist). Vanessa says that she thinks deeply about a lot of things when she poses. Snippets of Vanessa’s narrative will be played when the viewer touches different parts of her portrait.

I will be having a practice voice recording session in the Digital Media Department (with help from Tim, our resident sound expert) to test for the optimal way to achieve the best quality. This is scheduled for Wednesday 28th October. I will then need to teach Vanessa how to use the voice recorder (its not easy!) as she will take it home with her between studio sessions. Before that I will need to understand how to use it myself, so it is coming with me on holiday to Spain tomorrow (where I will be during our on-line Crit session next Tuesday afternoon!).

IMG_9534

Tim will also assist me at a later date when I need to edit the recordings to divide the narrative and transfer them to micro cards. These will be inserted into micro card readers attached to a pre-programmed Arduino linked to my hi-fi.

So we start with a life drawing in the Cheyne Drawing Studio in Chelsea which is booked for our sole use together with the resident art tutor on 30th October and again on 5th November. I will draw Vanessa in mainly black and white in charcoal and white pastel on a sheet of A1 or A2 cartridge paper or gunmetal coloured card

thumb_IMG_9526_1024                      thumb_IMG_9049_1024

Cheyne Drawing Studio                        An earlier portrait of Vanessa – I will draw in the same style

After the Cheyne Drawing studio session the portrait will be blown up to life size by projecting a photograph of it on to an oversize canvas. I will then mark out the areas I want to paint. I am still unsure where to get the canvas from as the largest I have been able to get from Cass Art is big but not big enough. Then I have the problem of eventually transporting it from home to Camberwell. Perhaps instead there is a CCA studio where I can produce the painting on the very large canvas, and store it there until it is needed for the next Camberwell MA Exhibition in July 2016?

thumb_IMG_9204_1024

I have decided to make the final portrait in an Art Nouveau (ish) style. Part of the reason for this fairly minimalist style is that it is sensitive to both the model and viewer as parts of the painting will be touched and the experience is less voyeuristic than it might have been if the original true to life drawing was used directly. It also lends itself to painting isolated areas in conductive paint.

I will then paint the picture and hopefully it might come out something like this. This is the hard part for me! I have never done anything quite like this before. I usually draw not paint.

thumb_IMG_9533_1024

Each area of conductive paint will be connected through the canvas to a terminal and it’s associated micro card reader attached to the Arduino – which will be hidden behind the floor standing picture.  When each area of conductive paint is touched by the viewer the Arduino will send a different narrative of Vanessa’s recorded voice direct from the associated micro card reader to my hi-fi. This pre-programming is already inbuilt in the Arduino supplied by BareConductive (thank you again Grace Attlee, first year MA Illustration).

This is the reason I acquired the Arduino from BareConductive as it saved me from having to learn to program it in Processing (see previous blog). I will of course test this entire set up on a small canvas before attempting to start the large painting. I will also talk to Patrick at BareConductive who Grace advises can tell me about various techniques for painting with conductive paint (as Henry Ford once said about his cars – ‘ you can have any color you want as long as it is black’). My Bare Conductive starter kit with extra paint and micro card readers can be seen below.

thumb_IMG_9524_1024

So lots of toys to learn to play with and hopefully I will produce a great piece of digital art work. My very first. Here goes!

Why start your research in the library?

What would be the reaction of our MA assessors if our reading references in our bibliography was BLANK? If our research was ALL from PRIMARY SOURCES such as interviews, survey’s and the like? Not an entirely possible approach but something that I would like to skew my research sources towards.

What is my research question? Why and how traditional artists’ adopt (or resist) new technology – which I will use to contextualise my traditional life drawing practice.  For my final exhibition I will contrast an example of my current work with pieces that progressively take advantage of some of the latest developments in digital technology.

So I am adopting one of the techniques I used in business: Networking. I have only just begun.

Firstly start at the top. The UAL Professor of drawing Stephen Farthing, RA – previously the Professor of Drawing at Oxford University. After attending his tutorial at the University of London yesterday he kindly agreed to meet me when he comes back to the UK in November. We will see where that takes me. I will ask him for two more contacts to talk to. And so on.

Secondly, use your current contacts and the same approach. So far: A painter, author on digital art and course leader for MA Computational Design at Ravensbourne University; A very successful painter who makes a living from his art and takes over a prime London Gallery for a week every year to exhibit and sell his work; A sought after installation artist whose work has been exhibited by Saachi, and who gets invited to show her work at major exhibitions including this year the Venice Biennale and shows in London, Paris, Berlin and Vienna; A recent MA graduate who is now working in one of London’s best known galleries which amongst others represent one of the World’s best digital artists.

I must start to read the books on Research that I have taken from our libraries and renewed three times. Or should I? Perhaps I will.

In the meantime any more suggestions for contacts will be gratefully received.

Processing Tutorial

Hi all MA Fine Art Digital online colleagues. As promised here is my recording of the Processing Tutorial by our Associate Lecturer Ed Kelly on Tuesday 13th October 2015. I suggest that you turn your sound UP. As you know the sound is somewhat crackly and the host computer goes down a few times. Enjoy!

Processing

La Cuenta Por Favor (The Bill Please)

I have come up against the first limitations to my Study Proposal project ambitions: Cost, CCA workshop resources and Time.

You may recall that I already have, as my starting point, a framed picture of the life model I am working with, so no extra cost there. My next two projects showing progressive moves into digital (the one’s Jonathan thinks I can accomplish for my MA) however involve some not inconsiderable expense.

The two projects I am referring to are: The floor standing life sized drawing of my model in Art Nouveau style where the model’s narrative is heard by the viewer by touching parts of the painting; and the large sculpture of her in angled slices through the 3D model made of MDF which will be painted with light possibly using a video of the model (a dancer) going about her everyday life. My aim is to use digital means to bring life, dynamism and 3D to what is otherwise a static drawing and to involve the viewer in the work.

For the first project I have just acquired a starter kit from BareConductive including some conductive paint and a pre programmed Arduino that together provide the means to give my life model her voice in the work. I will no doubt need additional paint and media input devices as I start to build the artwork. Fortunately I can use my existing digital art projector to mark out the outlines of my painting while maintaining perspective on the large canvas. Also my existing hand held voice recorder together with my hi-fi audio equipment to record and play the sound. However, I have yet to pay for the model and a private studio for the sitting (as life drawing at Camberwell is a group activity and the model would not be up for being scanned in these circumstances), and get a life sized canvas as the large ones I already have (the largest available from Cass Art) are too small. I am still up for this though and the life drawing sessions are already booked starting at the end of October.

For the second project I have already downloaded free student versions of the software needed (Itseez3D for scanning, Cinema4D/Bodypaint to hold the 3D model from the scanning process, and Autodesk 123D MAKE for producing the input to the laser cutter). I already have a hand held 3D scanner (Occipital Structure Sensor which I ordered from USA, and an iPad Mini with retina display) and I have purchased the Painting with Light software (for Projection Mapping) and taken an introductory on-line course in its use (comparatively with the other costs a very reasonable £65 for both). I am relying on Jonathan organising a full day Projection Mapping with Alex May during our Low Residency in order to get to the proficiency level needed to accomplish this aspect of the artwork. I also looked into the Raspberry Pi microprocessor option recommended by Alex May for displaying the video in a continuous loop but it is more complicated to make work than I anticipated. So I have found an alternative. This is the Micca Speck G2 1080p Full-HD Ultra Portable Digital Media Player for USB drives only available from USA from Amazon.com and costing 40 USD including import tax. So I have asked my sister to get me one for my birthday next week. A small but necessary saving.

Then I paid a visit to the Wilson Road 3D Resource Centre (the part for post grads only). I met Neil Moonstone who is the manager of this facility and Gillian Duffey who looks after the laser cutter.

Laser Cutter 1     Laser cutter 2

I had already sent both of them a brief for my project but neither seemed to have received it. So I sent it again to Gillian. However as she does not yet have a mobile phone or a computer (presumably supplied by the University) its a bit difficult to communicate with her at present  except in person at Wilson Road during the three days she works Mon-Wed. The facility is in the final process of being transferred from Peckham Road and at the time of my visit during the first week of October they were not yet open for business nor taking bookings. Our first formal introduction to the laser cutting workshop is not until 27 October but even then its in the diary as ‘EFT1 – lasercutting?’. Note the ‘?’.

I asked what format the file for the laser cutter needed to be in. Neil said it worked well with another piece of software for 2D drawing that I am not using (Adobe Illustrator), and Gillian said that she thought it could be FBX but was not sure. Gillian also said that it would take an hour to cut one small sheet of MDF 6mm max thick (£3.25 a sheet from the CCA Art Shop in Peckham Road – I need at least 50!!!). Also that MA students were allowed to book 1 hour a week which must be during the 3 days that she is around and when its not used for workshops. That means it would take me at least 50 weeks to produce my final work. i.e the entire time of my MA assuming I went every week, and not allowing for prototypes or mistakes!! I suggested that this really only allowed me to use her facility for making small prototypes of my sculpture. Gillian said that she knew that another student used an outsourced facility that did not cost full commercial rates and that she would try and get the name of it for me. Its in Hackney so only a two hour journey each way for me and even more cost. Heh Ho.

I took pictures of the Laser Cutter and looked up the manual on the manufacturer’s website. Apparently it says it can cut up to 9.5mm thick (not 6mm) and does take an FBX format input. I then checked what FBX C4D Release 17 (the latest and only version available to download for free as a student) uses. Its FBX 7.4 2014 (even though there is a version up to FBX 2016). I know that 123D MAKE can take the FBX version from the scanner, and so can C4D, so I later asked Gillian (in another email) which version of FBX her laser cutter can accept. I have also contacted the manufacturer. I am waiting for an answer from both. Nothing is easy.

Finally, to my other two projects which must from now on sit on the back burner so I will only review the assets I need to undertake the work.

I already have a Leap Motion device and paid for a Holus Holographic Display (which I ordered from Canada and is first available and due for delivery to me in March next year). However I have found a new technology Holoflex that may work even better (but probably cannot use as I have already acquired something else).

holoflex

I also have recently acquired an Intuos Graphics tablet and a MacBook Pro with a super fast graphics processor. What I didn’t have were the ready made still and animated 3D models which I would then paint. The Leaping over chairs model I referred to in my last blog I found cost 699 US dollars before conversion from Maya to C4D and that also requires a lot of rework afterwards (caused by FBX version differences) which I would have to outsource. So a step too far. I have therefore spent a lot of time looking for alternatives.

I managed to find iClone software from Reallusion Inc which allows cloned animated 3D models to be relatively easily modified to suit my purpose. Sadly this only runs in Windows and therefore I need a PC to run the application or run it in emulation on a Mac using Boot Camp software (with use and performance implications). Fortunately my mother in law no longer needs her PC VIAO laptop (although it will probably need upgrading to adequately cope with the demands of processing graphics). Additionally  I discovered that a student version costs 599 USD while a free download only lasts 30 days! A month’s use may have to be enough, but I have written to the USA supplier about the possibility of a longer loan and to clarify the looming FBX version issue for import to C4D.

For my records here is the support response from Reallusion

http://www.reallusion.com/CustomerSupport/UserEx/UQAMsgList.aspx?trackNo=18acfb68-a867-4bf8-b31e-2fd3291e11f7&lang=1

Finally I found and bought 3D animations from SKAMotion that I can manipulate in either DAZ3D Studio (free) or Poser Pro (which I had previously bought for about £100). These 3D models cost another £140 but its done now, and I know that these can be imported to C4D without any FBX issues.

SkaMotion Animation

So I think I now have almost all the assets I need to complete all my projects. At considerable cost which when you include such software as iMindMap for project planning is up there with the first year fees for our MA!

I have now almost completed my Research for Art. Until I have submitted my Study Proposal on 3 November I am now going to concentrate on so far almost neglected Research into Art. I will make a start on Research through Art (making) after that for the two weeks left of Unit 1 of my MA.

So now its Research, Research, Research. Just as well that the six UAL libraries cost nothing to use. Thank God. I’m broke.

A Lecture, Workshop, Exhibition and Talk

Its been a busy week. Again…..But very enjoyable.

Lecture

Nick Gorse (our dean at CCA) gave a very good lecture on Research. The main points I take on board are ‘Avoid Shallow Research’, ‘Primary Sources are best’, and ‘Stop your research in time to finish your paper’. The last was humorously illustrated by his own experience where he never finished researching (as it was so interesting), and even when he started his paper after six months and two weeks to go he started researching again (because writing his paper was so boring). He never submitted his paper because he never finished it!

At the end he generously invited the attendees to contact him if they needed help with their research and left us with his email address. I bumped into him outside after the lecture and took him up on his offer. I said that my research was ‘why traditional artists explore digital’. As primary research was best, was he proposing to invite Grayson Perry (our recently appointed UAL Chancellor) to visit Camberwell (a before and after viewing if Grayson Perry was to open the new building). Grayson is essentially a potter and Camberwell is Craft. If so could he please put me in contact so that I may understand why he produced a major work using digital means (The Walthamstow Tapestry, designed in Photoshop and produced on a computer loom in Flanders). He pointed me towards ‘Claire’ (Grayson Perry’s alter ego) on Twitter, saying he was quite good at responding. No visit then! But I will follow this up.

Grayson Perry

I am drawing blanks on finding other traditional artists who have been digitally inquisitive and are still alive. Searched for hours on the internet and only came up with David Hockney – who I knew about already – I saw his one man exhibition at the Royal Academy of Arts. Any new names for me to look into would be much appreciated. If they have a Twitter account so much the better.

Workshop

I attended a ‘Painting With Light’ Introductory Workshop on Skype given by Alex May (see my previous blog and his recent exhibit at the V&A). It lasted two hours and was very worthwhile. I thought that I was recording a video of the proceedings (at Jonathan’s request) but sadly only managed to make a voice recording. You can down load his software for Projection Mapping by following the instructions on my earlier blog.

Here is a 40 second video on my set up at home ready for the workshop.

I discussed this with Jonathan at my First 1-2-1 Tutorial and suggested that if he were to invite Alex May to come to our Low Residency it would need a whole day. Two hours for the Introductory Workshop, an hour for Alex May to show his work, and an afternoon for us to use the software to projection map on to our own objects under his tutelage.

My objects are still in my room as I have not had the time to take them down!

Exhibition

I went to the On Your Wavelength Exhibit in a railway arch at Bankside’s Immersive Arts Festival. It was fascinating. Fortunately I went when it was not so busy (my other Fine Art Digital colleagues who attended the day before were not so lucky). So I wore the headset that measured my brainwaves and stood in the pitch black before the huge circular portal into another World where my brainwaves created a unique light show.

Wavelength

Angie who worked there and who had taken the time to explain the exhibit to me remarked on my show. She said that it made her feel happy. I said I was thinking about my family at my childhood home when I was very young (both my parents are dead and my father died when I was 13). I said that I was feeling melancholy. I then thought about something else which I am not willing to disclose.

What fun. Hugely impressed.

Talk

I also attended the first of Futures Talks – ‘Animating the Web’. Interesting but not Inspiring. I think because it was three young CCW alumni talking about their business start ups and most attendees wanted to be set alight by the actual talk topic which got them there in the first place.

I was impressed that one company now employed 15 staff, kept them in work, and were still solvent. No mean achievement. I was interested how they promoted their business (See Animade.tv) by using Blogs and Social media and little other different types of marketing and asked them about this during the Q&A.

I also asked the owner of the other business (Squarespace who had innovative ways to teach coding supported by their own software) whether I could be controversial. As I got the nod, I said whilst I had experience of coding and building systems commercially (A lot – but I didn’t say that) my personal objective was to avoid coding if at all possible in order to concentrate on being creative not on the means to do so. I could achieve this by using shortcuts namely software (e.g. iClone) or examples I could easily modify (e.g Poser or Daz3D Market Place) or pre-programmed  microprocessors such as Arduino (e.g. from BareConductive). I suppose its horses for courses as another student in the audience remarked that she expected there would come a day when every child would be taught to code at school. I hope not. I prefer the HAL approach (Film 2001 – incidentally, move up one letter to the three in HAL and see what you come up with – I used to work for them) or a Robot (Film Ex-Machina) but then they did get emotional and kill their users!

In the pub afterwards Alejandro and I had a long interesting discussion (granted after several pints!). We expected more both of the Futures Talks and of the Dean. UAL has a huge reputation in the art World. If Oxford and Cambridge can invite the president of the USA to talk or debate why can’t we get World renowned Artists to come to our events?

I think after three pints we both said that we would club together and try!

My First 1-2-1 Tutorial

This first tutorial with Jonathan way surpassed my expectations. The main achievement was an academic direction for my study proposal: How artists past and present have adopted new technologies in their art practice and why, then use this analysis to contextualise the extension of my traditional life drawing into the digital World.

We reviewed my work so far: 7000 words on my WordPress blog (even I was surprised when I totaled them up) essentially writing up what I have done in my first 4 weeks on the MA; A first (incomplete) draft of my Study Proposal; A very simple mind map of my work plan showing completed work and tasks for the next 4 weeks (shown below); Illustrations demonstrating the first three of the five making projects for my first year and final exhibitions.

My first three making projects are: To show my starting point, an existing charcoal drawing of the model (Vanessa) who I am working with for the other two projects; A large floor standing life painting in an Art Nouveau style with snippets of the model’s narrative in her own voice played when different parts of the work are touched by the viewer; A large sculpture of the model made from sheets of MDF angled through the sculpture, and painted with light (projection painting) using a video on a continuous loop (possibly of the model going about her daily life – she is a classical dancer).

My aim is to bring my life drawing to life: It is no longer a static object to be admired in silence. The model is part of the work not just the object of it and the viewer can engage with it.

Study Proposal 1_2

Study proposal 2_2

Jonathan surprisingly said that from what he saw he was confident that I could achieve the first 3 of my projects . So my hidden thought coming back to his immediate reaction to my first study proposal presentation (see earlier blog) ‘Terry you have 5 MA’s there’ looks like Jonathan believes that I can do three. I wonder then does that get me 3 MA’s?! No need to answer that one. However, I said that to achieve the thrust of my study proposal I really need to complete the first four.

I was completely upfront and said while I was confident about the making side of my MA, I do not have an academic background in art or any art related qualification apart from garden design: Therefore my weakest area is determining lines of enquiry for the academic work necessary to contextualise my practice. As you can see from my opening remarks we pretty much resolved this even though it may need a little refinement. So I will start by examining the Futurist movement. The advice that Jonathan gave me is summed up in this recording (7 minutes – Please turn your sound to Maximum).

Now I need to make a start on research so that I can flesh it out for my study proposal submission on 3 November.

Not so fresh now!

Freshers

This was to be my first experience of Freshers. I turned up at Chelsea Uni Parade Ground at 5.30pm and it was totally deserted, with lots of huge completely empty marquees. I asked the security guy where the Freshers event was. All down the pub? Yes he said. “Not so fresh now”. He ho. Perhaps next year when I am not so fresh either!

Lots happening this week.

Lecture on Action Research

Jonathan gave a really thought provoking lecture on action research espousing critical refection. I didn’t get it before, but I do now. It’s much better when it is explained clearly in plain English and when the audience is engaged in thinking and responding about it.

Meeting to discuss implementing my study proposal

I had another meeting with Matt Edwards. He showed me around the Digital Media Centre and I leant him some of my toys to play with. The Occipital Structure Sensor – a scanner attached to the iPad mini, and a Leap Motion device. He later helped immensely by solving a problem I anticipated would arise later when I show the drawn 3D life model using a projector and the leap motion. I only want to see the model not all the icons etc around it when you view the model in C4D. The answer from Matt was:

“I’ve been looking into how you’d display your 3d model in an exhibition scenario. Quite straightforward really…You export the file out of C4D, ready to use in Sketchfab which is a 3D render viewer, the file will be hosted on their website. Then you can embed that file on your own website or Behance, which can be displayed in it’s entirety, very easily, and controlled with your LEAP motion sensor. See tutorial http://blog.sketchfab.com/post/51326826537/how-to-upload-from-c4d-to-sketchfab”.

Now that’s great Tech support! Thank you Matt.

Getting a ready made 3d animated model for me to paint

First of all its not easy. There are few ready made animations around particularly to suit my purpose and in C4D format. But I found one on Turbosquid. Sadly its in Maya. So I enlisted the help of Turbosquid (who want to sell it to me) who converted it to C4D for me but her hair does not stay attached to the 3D model. So she’s bald in C4D! Then I contacted my tutor on the 2 day one to one I attended recently, Matt O’Neill. He kindly offered to solve this problem for me. So soon I will have the starting point for painting a 3D animation in 3D in C4D/Bodypaint3D with my Intuos Pro Large Graphics tablet. So far I haven’t even used Bodypaint or the graphics tablet so this will be a baptism of fire! Here is the animation which I propose to paint:

Zoe rigged Pic

Making a sculpture using the Laser Cutter

Matt also put me in touch with the gatekeepers of the Laser cutter. Here’s a shortened version of what I sent Gillian Duffy and Neil Moonshine at the 3D Resource Centre in Wilson Road describing my project with the aim of meeting them to discuss it (and to get them excited about it). I included some pics which I have shown in my previous blogs so I won’t bore you with them again. I hope to get a response soon as this will be my first use of Camberwell’s making facilities and I can’t wait to start.

“I plan to produce a large sculpture formed of slices of MDF. I will be outputting a file from Autocad 123D MAKE and would be grateful if you could tell me what format this file needs to be in for your laser cutter. Firstly I would trial the process with a few pieces of MDF using a ready made 3D model just to check that I am going about it in the right way. Then I would make a smaller version of the final work also using a ready made 3D model. Finally I would want to make a 50-80cm tall model from a live scan using the process described below. A trial run in 123D MAKE of a ready made 3D model 50cm tall suggested that it would take 47 small sheets of MDF 1cm thick with 313 parts. For a larger model or less thick MDF (say 8mm) it would take more. I have never used a laser cutter before so have no idea what this involves but it sounds like it could take some time.

Step 1. Pose a ready made 3D model from Daz3D Market Place online and POSER software.
Step 2. Export this to 123D MAKE to produce the input to a laser cutter. This will be angled slices through the model.
Step 3 Use the laser cutter to make the head only as a trial run assuming the model was 50-80cm tall
Step 4 User the laser cutter to make another trial run of the whole model at say 30cm tall
Step 5 Make a scan of the live life model using the structure sensor I already have (I have lent it to Matt for this week if you are interested)
Step 6 Use the laser cutter to make the head of the live model at 80cm tall using 1cm slices of MDF
Step 7 Assuming step 6 is successful continue to use the laser cutter to make the rest of the parts for the entire model
Step 8 Assemble the model which would be similar to the photo below
Step 9 I then intend to paint the model with light (projection mapping) with sound. Please see clip of what this looks like (but on a model of a paper tiger). In my video the colours will change.
Step 10 Check this installation out in a UAL (hopefully Camberwell) location where the projection mapping starts after 2 minutes on a rolling cycle”

Projection Mapping

Tomorrow I attend a Skype tutorial from Alex May on ‘Painting with Light’. Here is the prep he asked us to do tomorrow morning:

1. Please test your Skype setup- I’ll be online 15-30 minutes before the workshop is due to start and will begin to add everyone during that time so we can all check our audio/video is working. Before this, if you could do a Skype test call to make sure your sound and microphone are working correctly, that’d be great! If possible, can you use headphones rather than speakers to reduce the possibility of feedback.

2. Install Painting With Light – Make sure you have installed the software before the workshop starts so we can get going as promptly as possible. I’d recommend using the very latest 1.5 version, which has some great new features that you will like! Download from: http://www.bigfug.com/blog/painting-with-light-1-5-1160-beta/

3. Use a projector, if you have one. Painting With Light is designed to be used with a video projector, and the tools will make more sense if you follow along with a projector attached.However, don’t worry if you don’t have one available – this won’t stop you being able to use the software.

4. Collect a few objects to use – As video mapping is all about projecting onto objects rather than flat walls, you’re going to need some things to project onto! Cardboard boxes and wood blocks are quick and easy but try lots of different shapes and materials. Not everything will be a good projection surface (dark and/or shiny surfaces in particular) but this is all about experimentation with the medium so use whatever you fancy!

5. Video footage – I’ll prepare a small archive of video clips for everyone to use during the workshop, but if you want to use your own images and video, or download things from the Internet (the newest version even supports animated GIF’s!) then please do. The only guideline you need to worry about at this point is making sure the resolution isn’t too big (not the size of the file, rather the number of pixels wide/tall it is). Even photos and videos taken on your phone might be thousands of pixels wide/tall so you might need to scale them down in Photoshop (for images) or something like Handbrake (for video).You can read more about the specific requirements in the Painting With Light manual, available at: http://www.bigfug.com/manuals/painting-with-light/

I will be using a few cardboard boxes and a statue of Buddha from my garden, together with my digital art projector. I will let you know how I get on.

Getting ready for scanning and painting the life model

I have now discussed and agreed with my life model Vanessa that she will also provide the voice of the model to go with my oversize painting of her in the Michel Canetti style. Scanning and painting is set to begin in the Cheyne Drawing Studio on 30 October. I can’t wait to get started.

Well its been a busy week including trips to Chelsea and Camberwell libraries to get some books on Art Practice as Research as a ‘light read’ during my week in Spain in a couple of weeks time.

I think I need a rest! So off to supper now with my wife to a local Italian restaurant.