Author Archives: terencemquinn91

Unknown's avatar

About terencemquinn91

Artist involved with Mixed Reality integrated with physical art installations. MA Fine Art Digital (Distinction), and Visiting Practitioner at UAL.

A Lecture, Workshop, Exhibition and Talk

Its been a busy week. Again…..But very enjoyable.

Lecture

Nick Gorse (our dean at CCA) gave a very good lecture on Research. The main points I take on board are ‘Avoid Shallow Research’, ‘Primary Sources are best’, and ‘Stop your research in time to finish your paper’. The last was humorously illustrated by his own experience where he never finished researching (as it was so interesting), and even when he started his paper after six months and two weeks to go he started researching again (because writing his paper was so boring). He never submitted his paper because he never finished it!

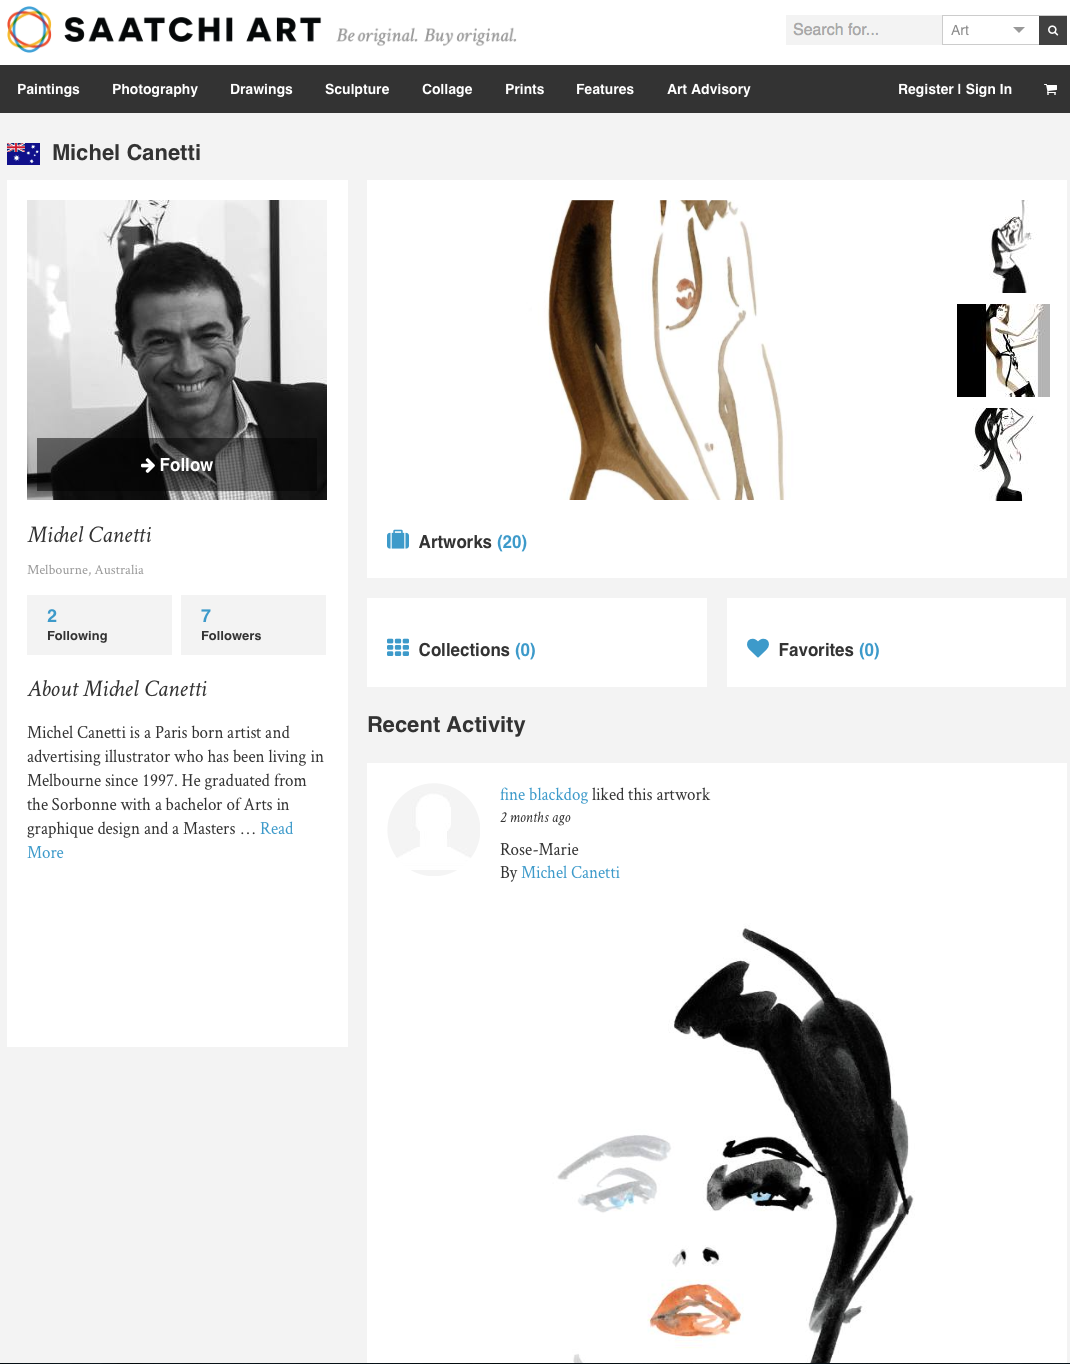
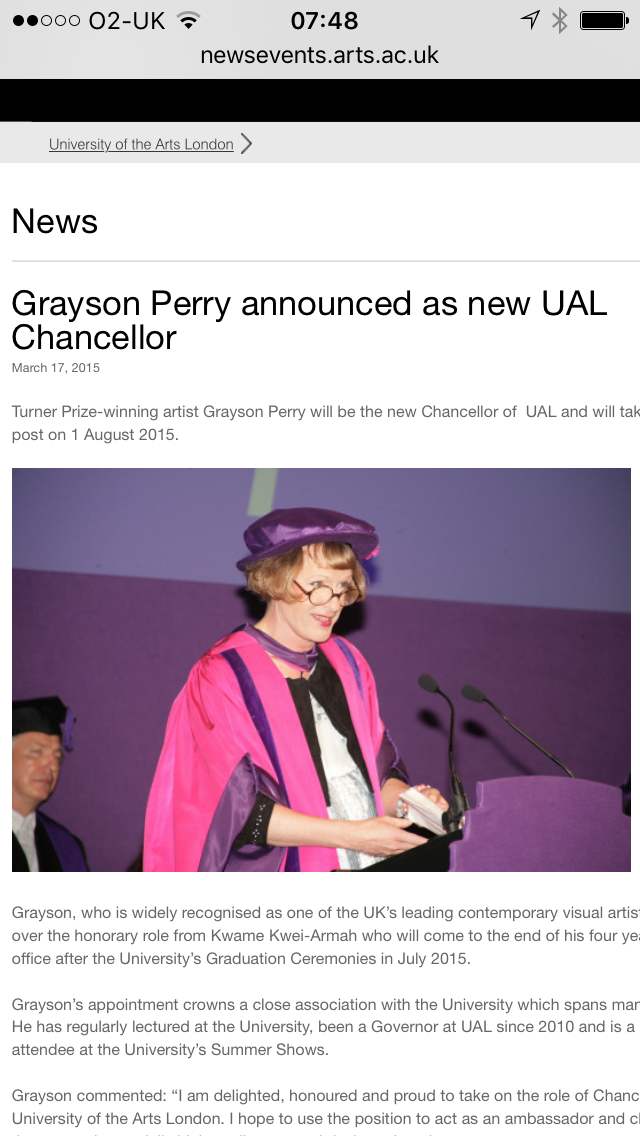
At the end he generously invited the attendees to contact him if they needed help with their research and left us with his email address. I bumped into him outside after the lecture and took him up on his offer. I said that my research was ‘why traditional artists explore digital’. As primary research was best, was he proposing to invite Grayson Perry (our recently appointed UAL Chancellor) to visit Camberwell (a before and after viewing if Grayson Perry was to open the new building). Grayson is essentially a potter and Camberwell is Craft. If so could he please put me in contact so that I may understand why he produced a major work using digital means (The Walthamstow Tapestry, designed in Photoshop and produced on a computer loom in Flanders). He pointed me towards ‘Claire’ (Grayson Perry’s alter ego) on Twitter, saying he was quite good at responding. No visit then! But I will follow this up.

Grayson Perry

I am drawing blanks on finding other traditional artists who have been digitally inquisitive and are still alive. Searched for hours on the internet and only came up with David Hockney – who I knew about already – I saw his one man exhibition at the Royal Academy of Arts. Any new names for me to look into would be much appreciated. If they have a Twitter account so much the better.

Workshop

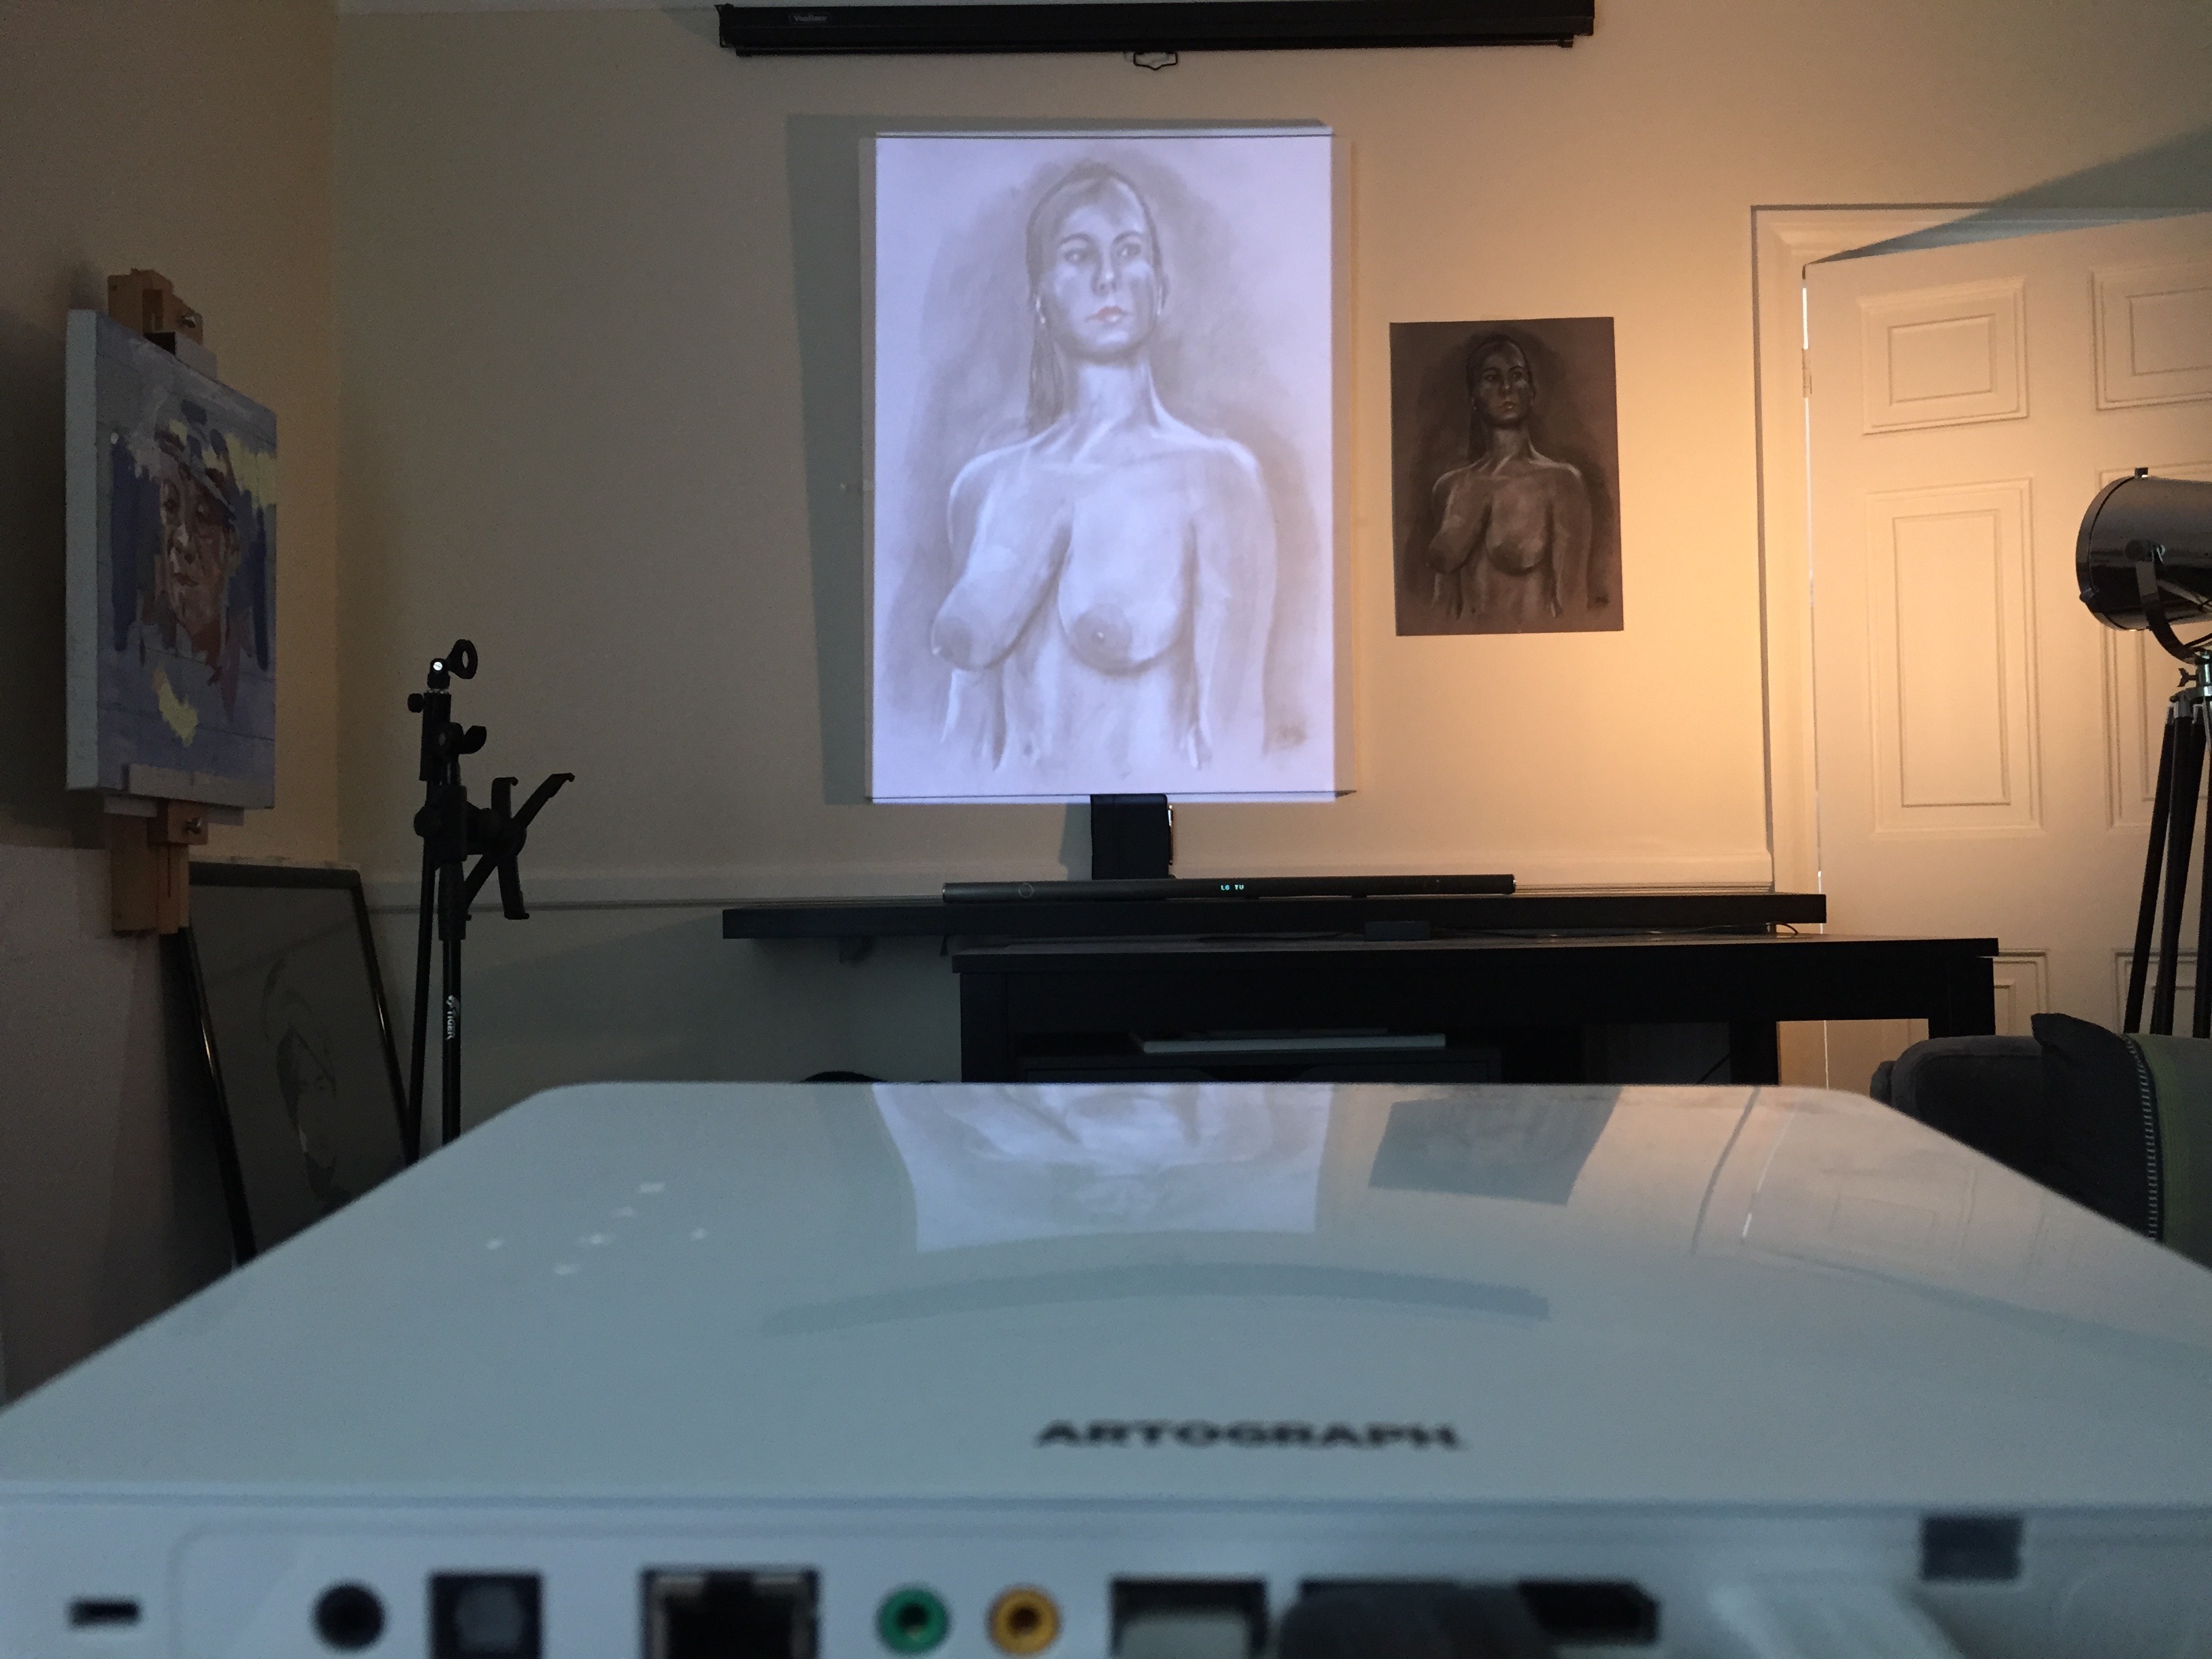
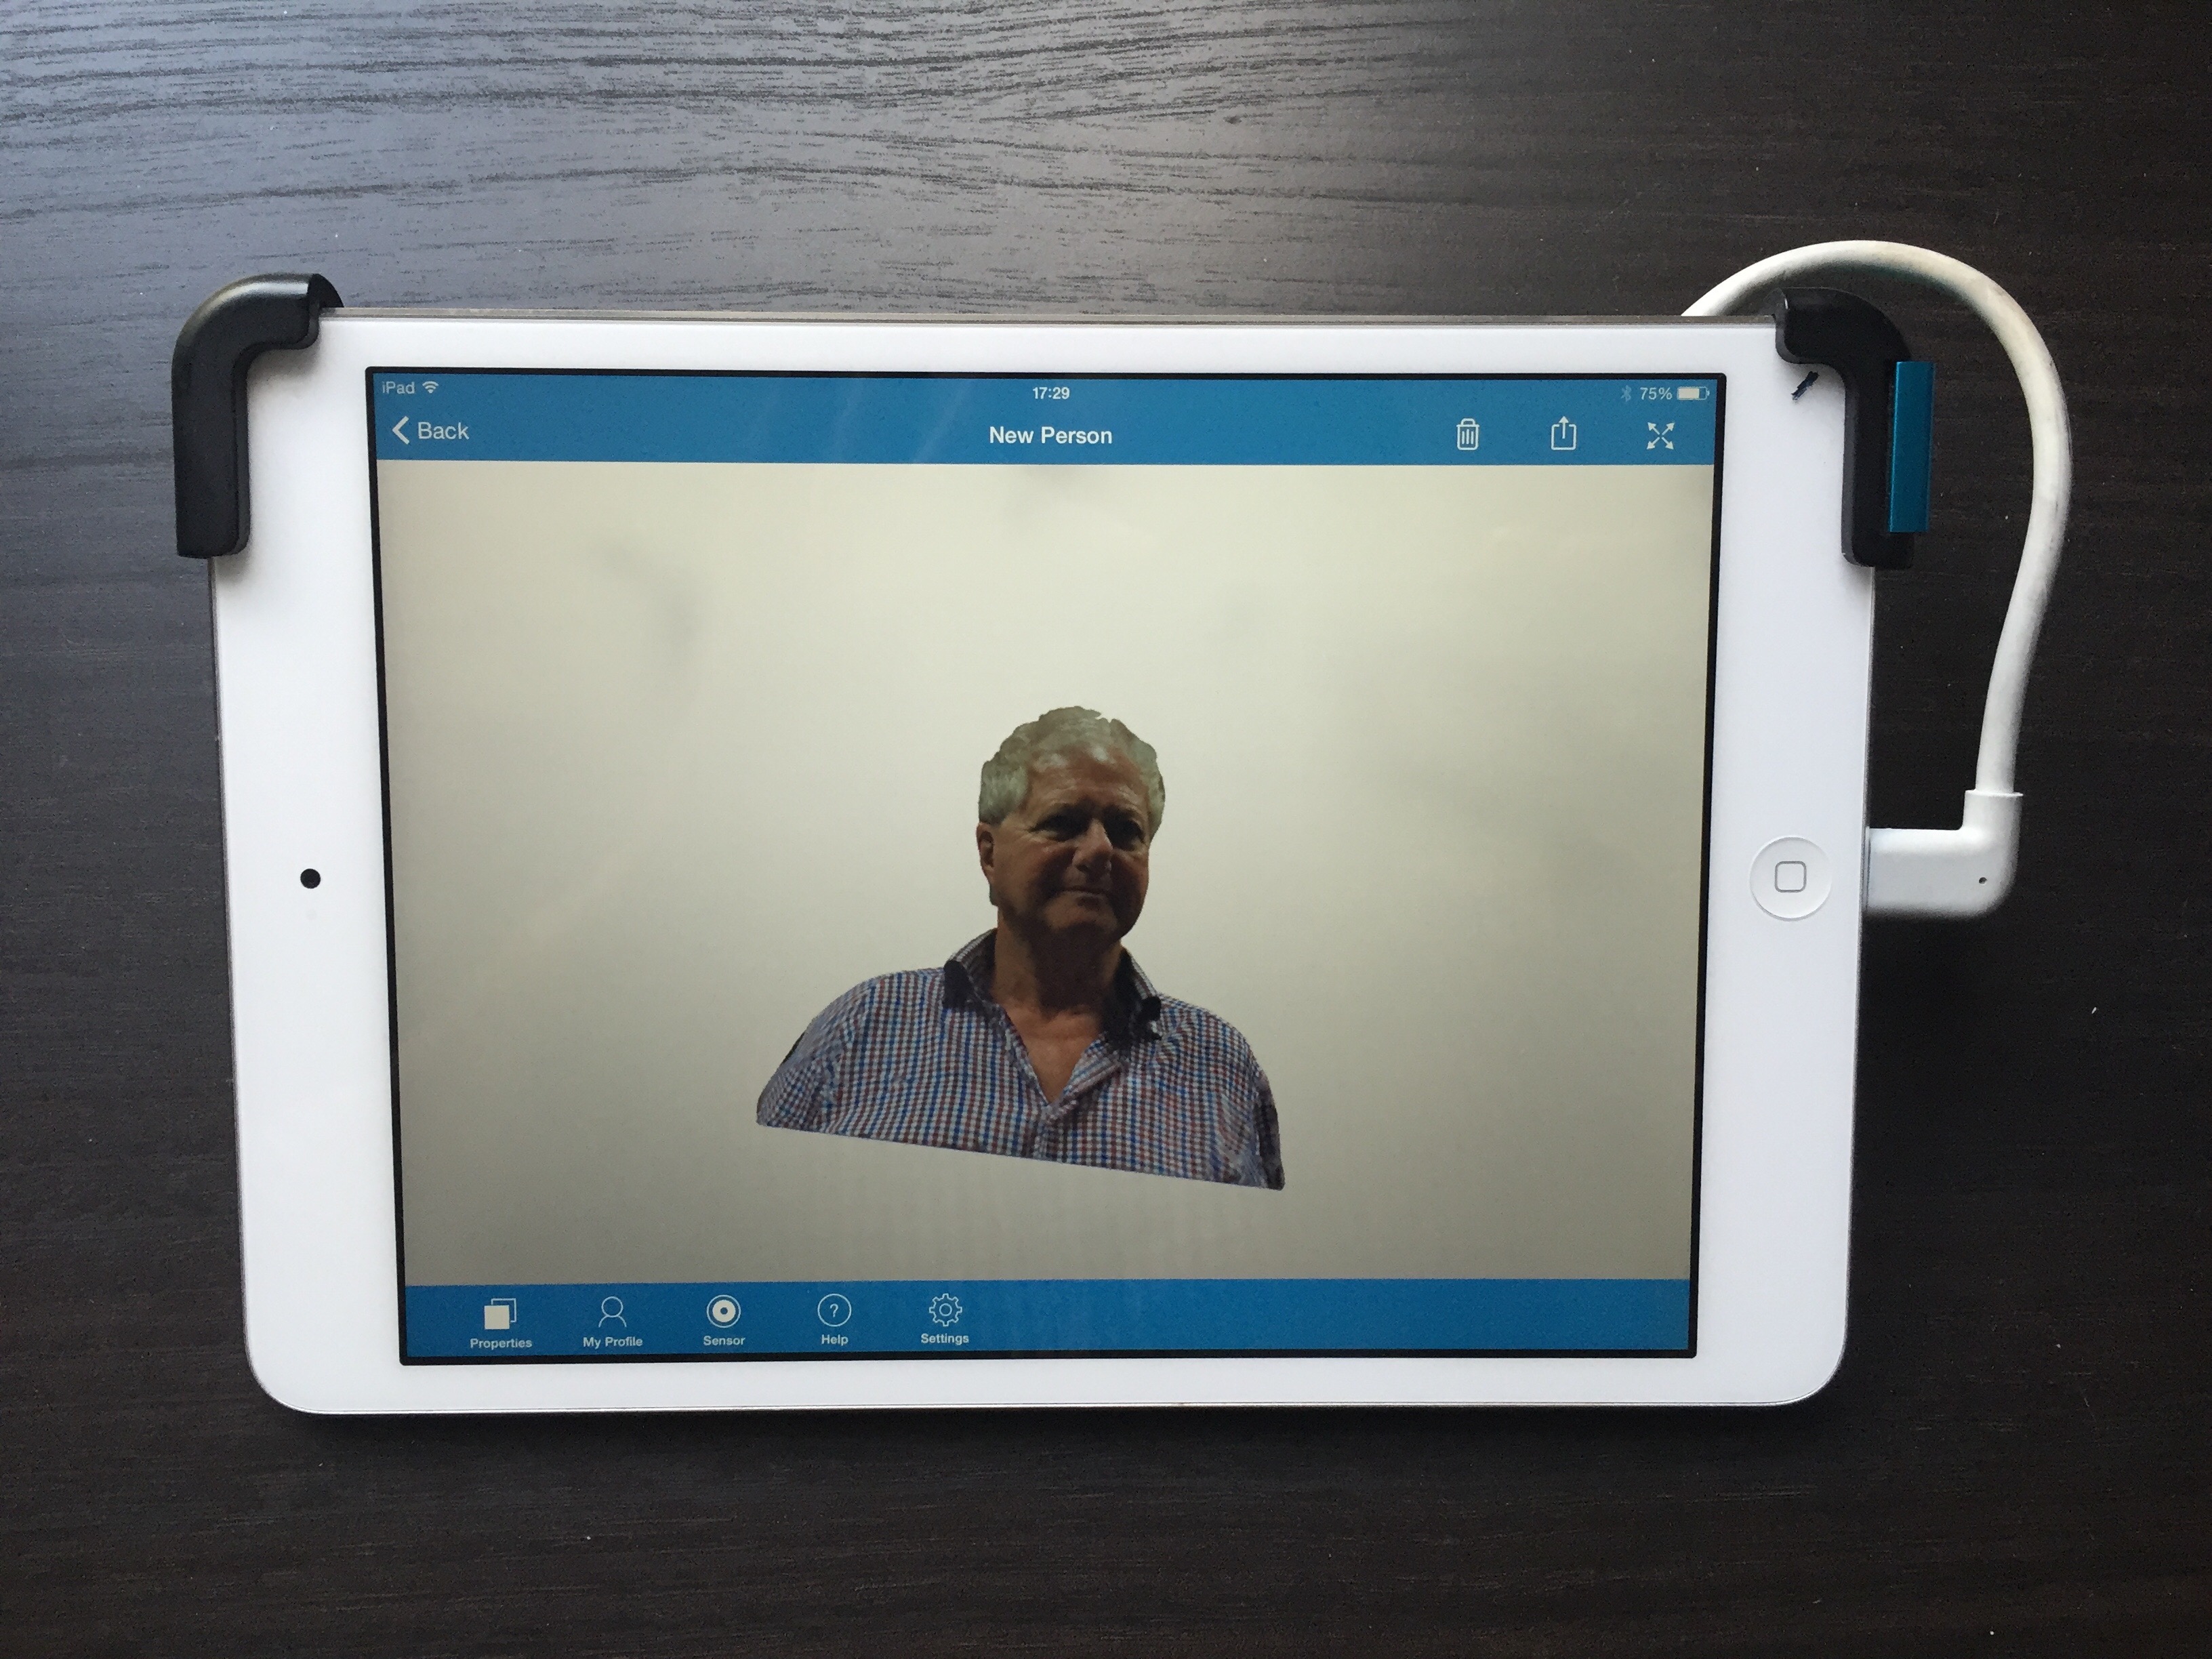
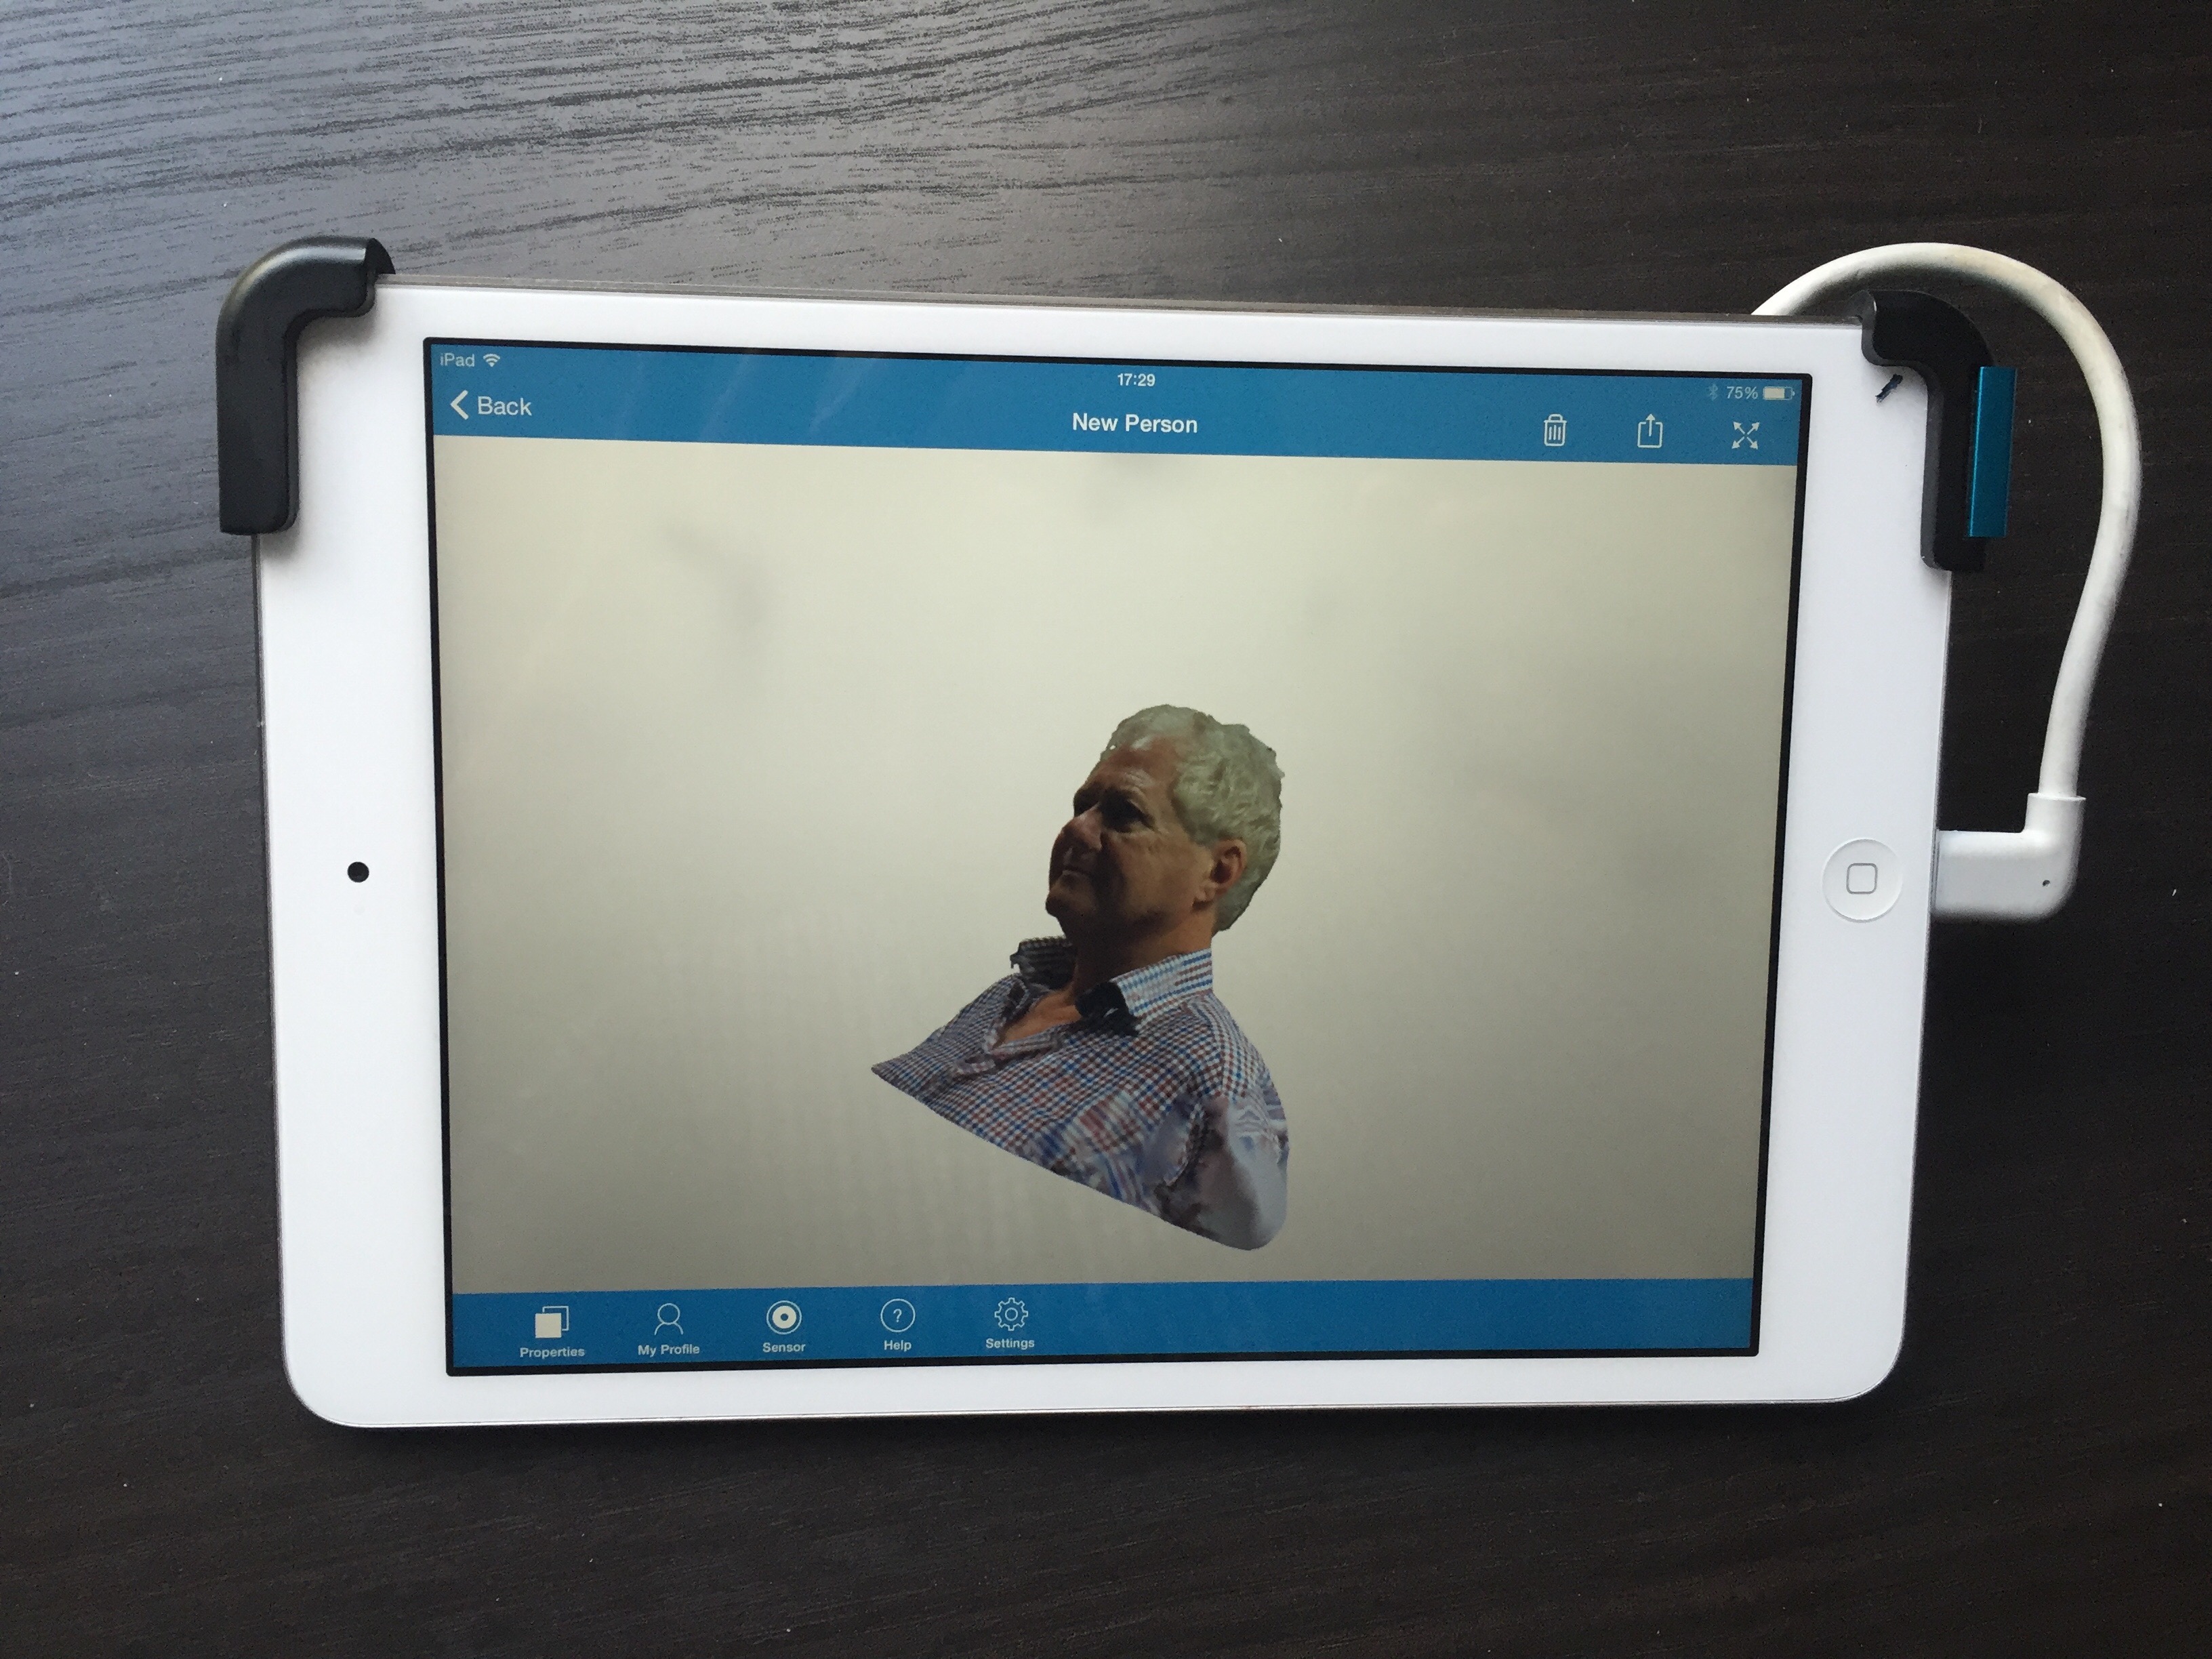
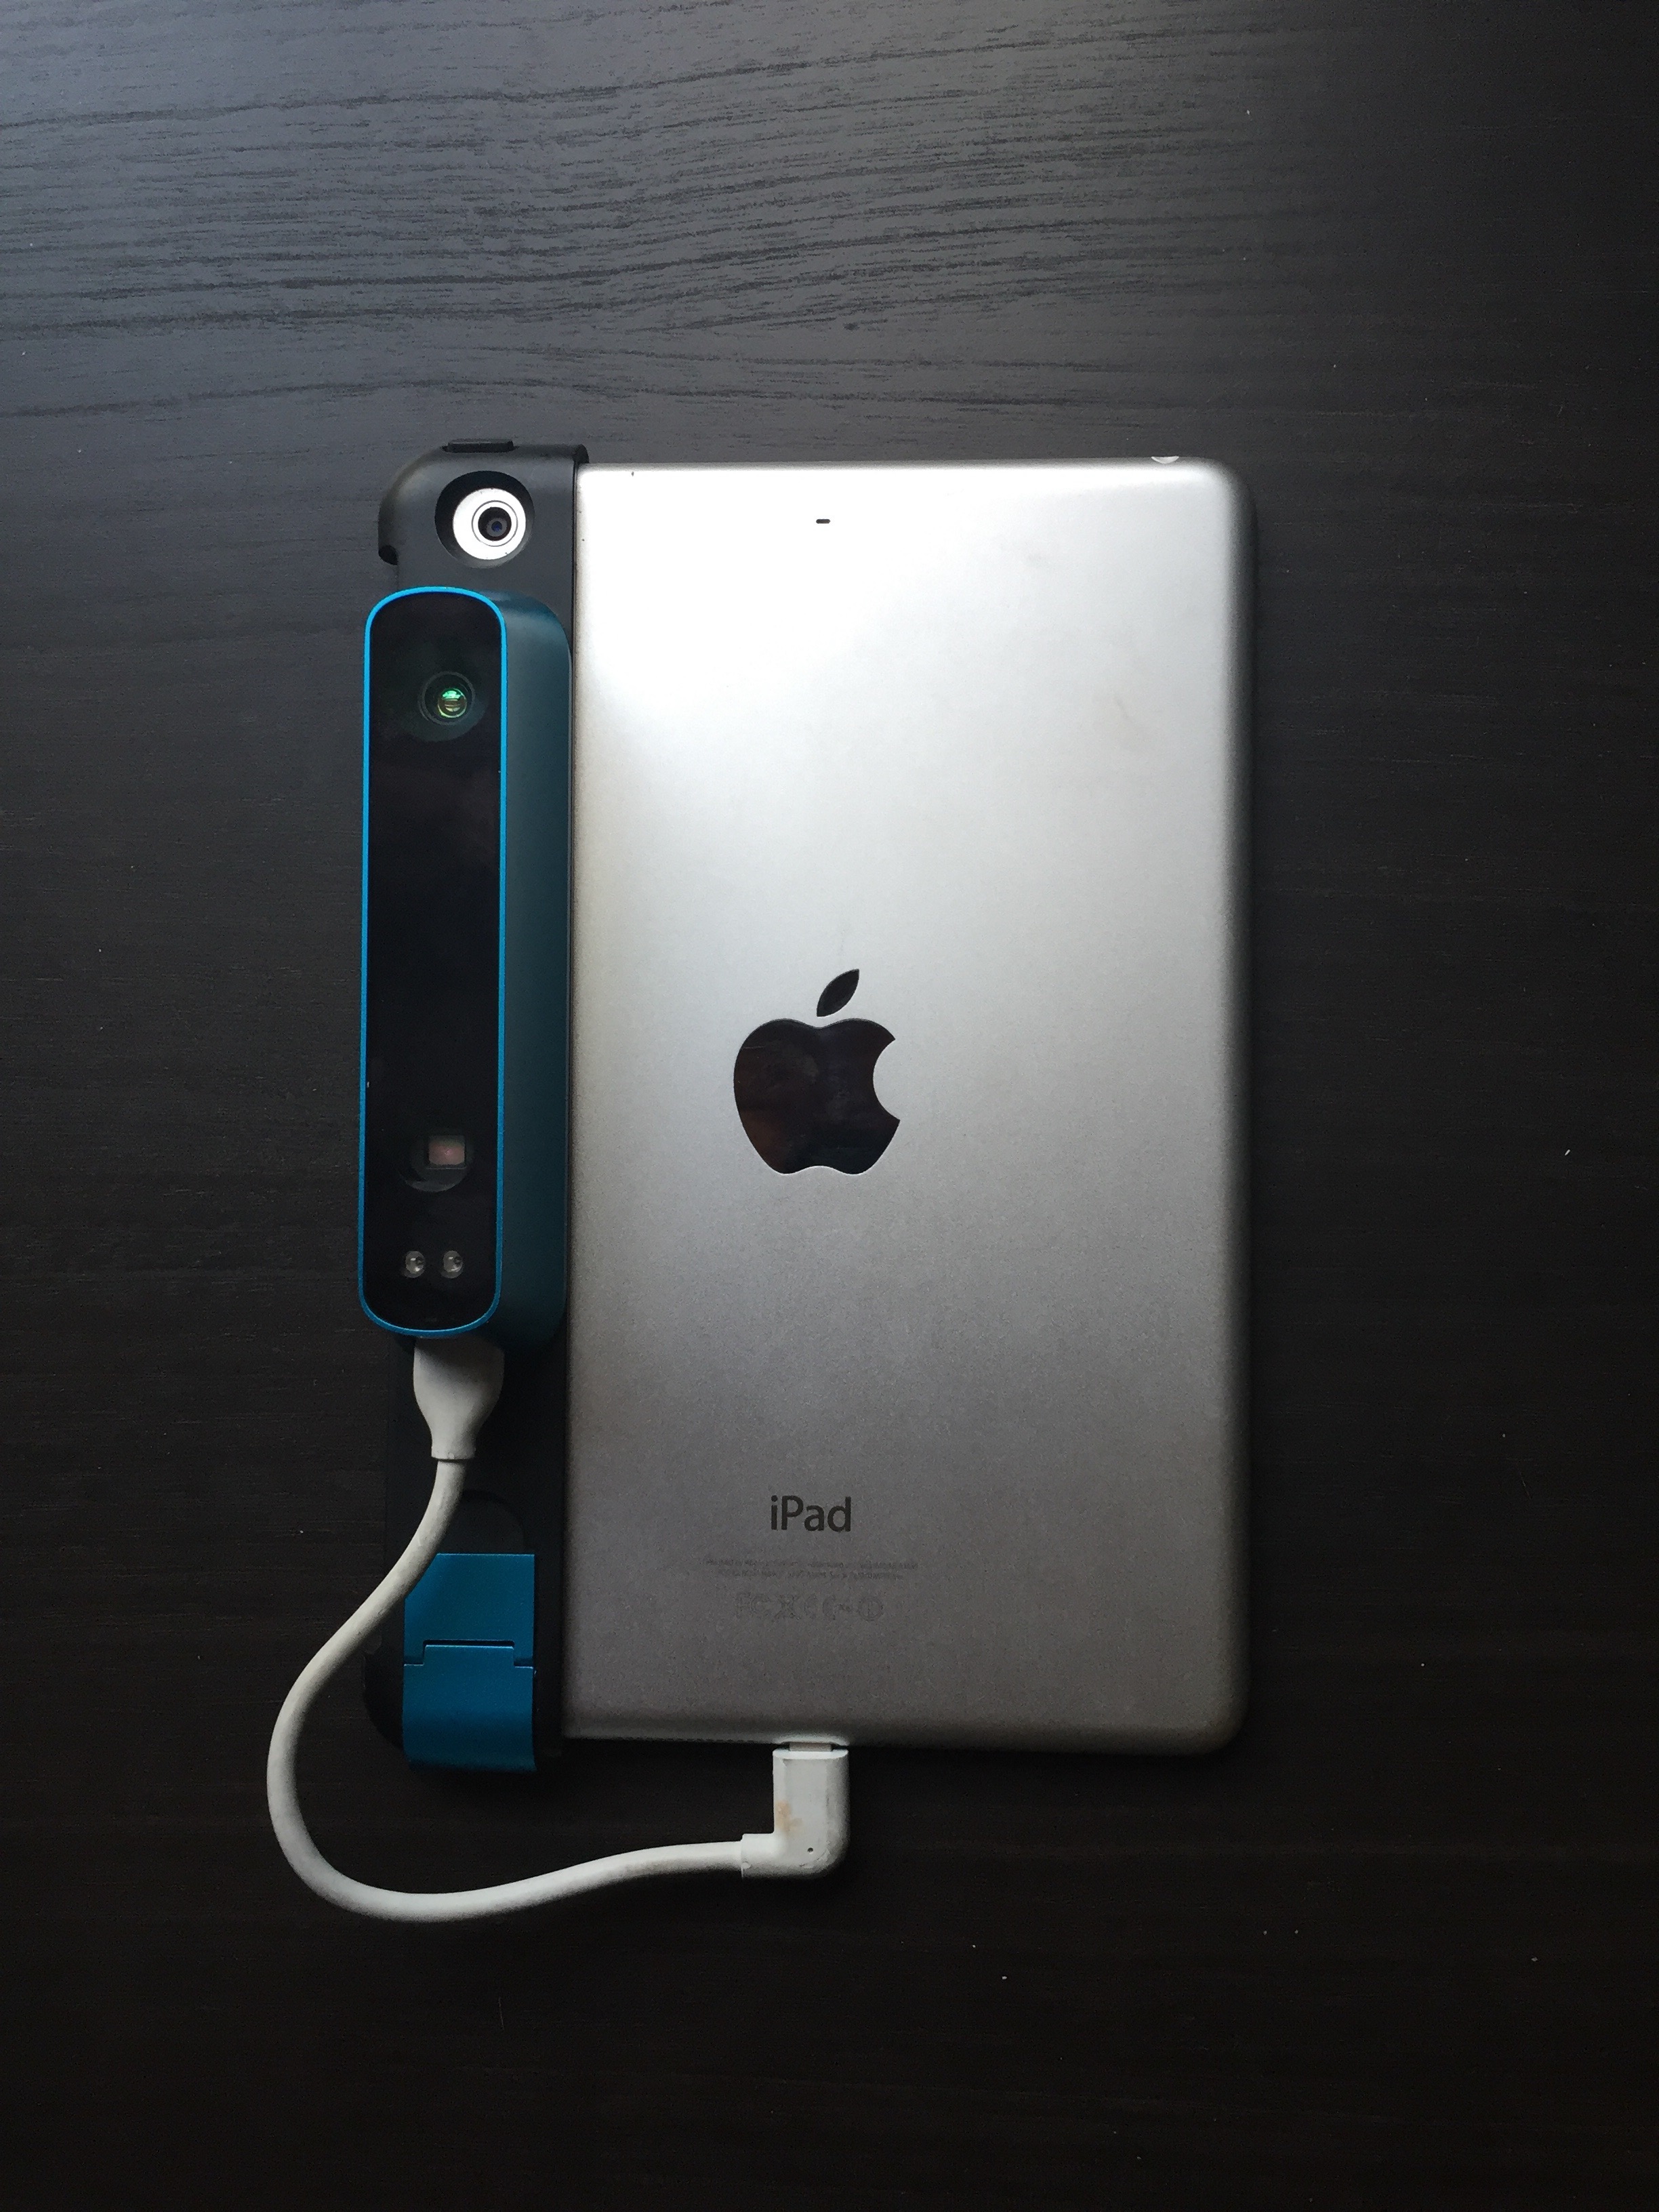
I attended a ‘Painting With Light’ Introductory Workshop on Skype given by Alex May (see my previous blog and his recent exhibit at the V&A). It lasted two hours and was very worthwhile. I thought that I was recording a video of the proceedings (at Jonathan’s request) but sadly only managed to make a voice recording. You can down load his software for Projection Mapping by following the instructions on my earlier blog.

Here is a 40 second video on my set up at home ready for the workshop.

I discussed this with Jonathan at my First 1-2-1 Tutorial and suggested that if he were to invite Alex May to come to our Low Residency it would need a whole day. Two hours for the Introductory Workshop, an hour for Alex May to show his work, and an afternoon for us to use the software to projection map on to our own objects under his tutelage.

My objects are still in my room as I have not had the time to take them down!

Exhibition

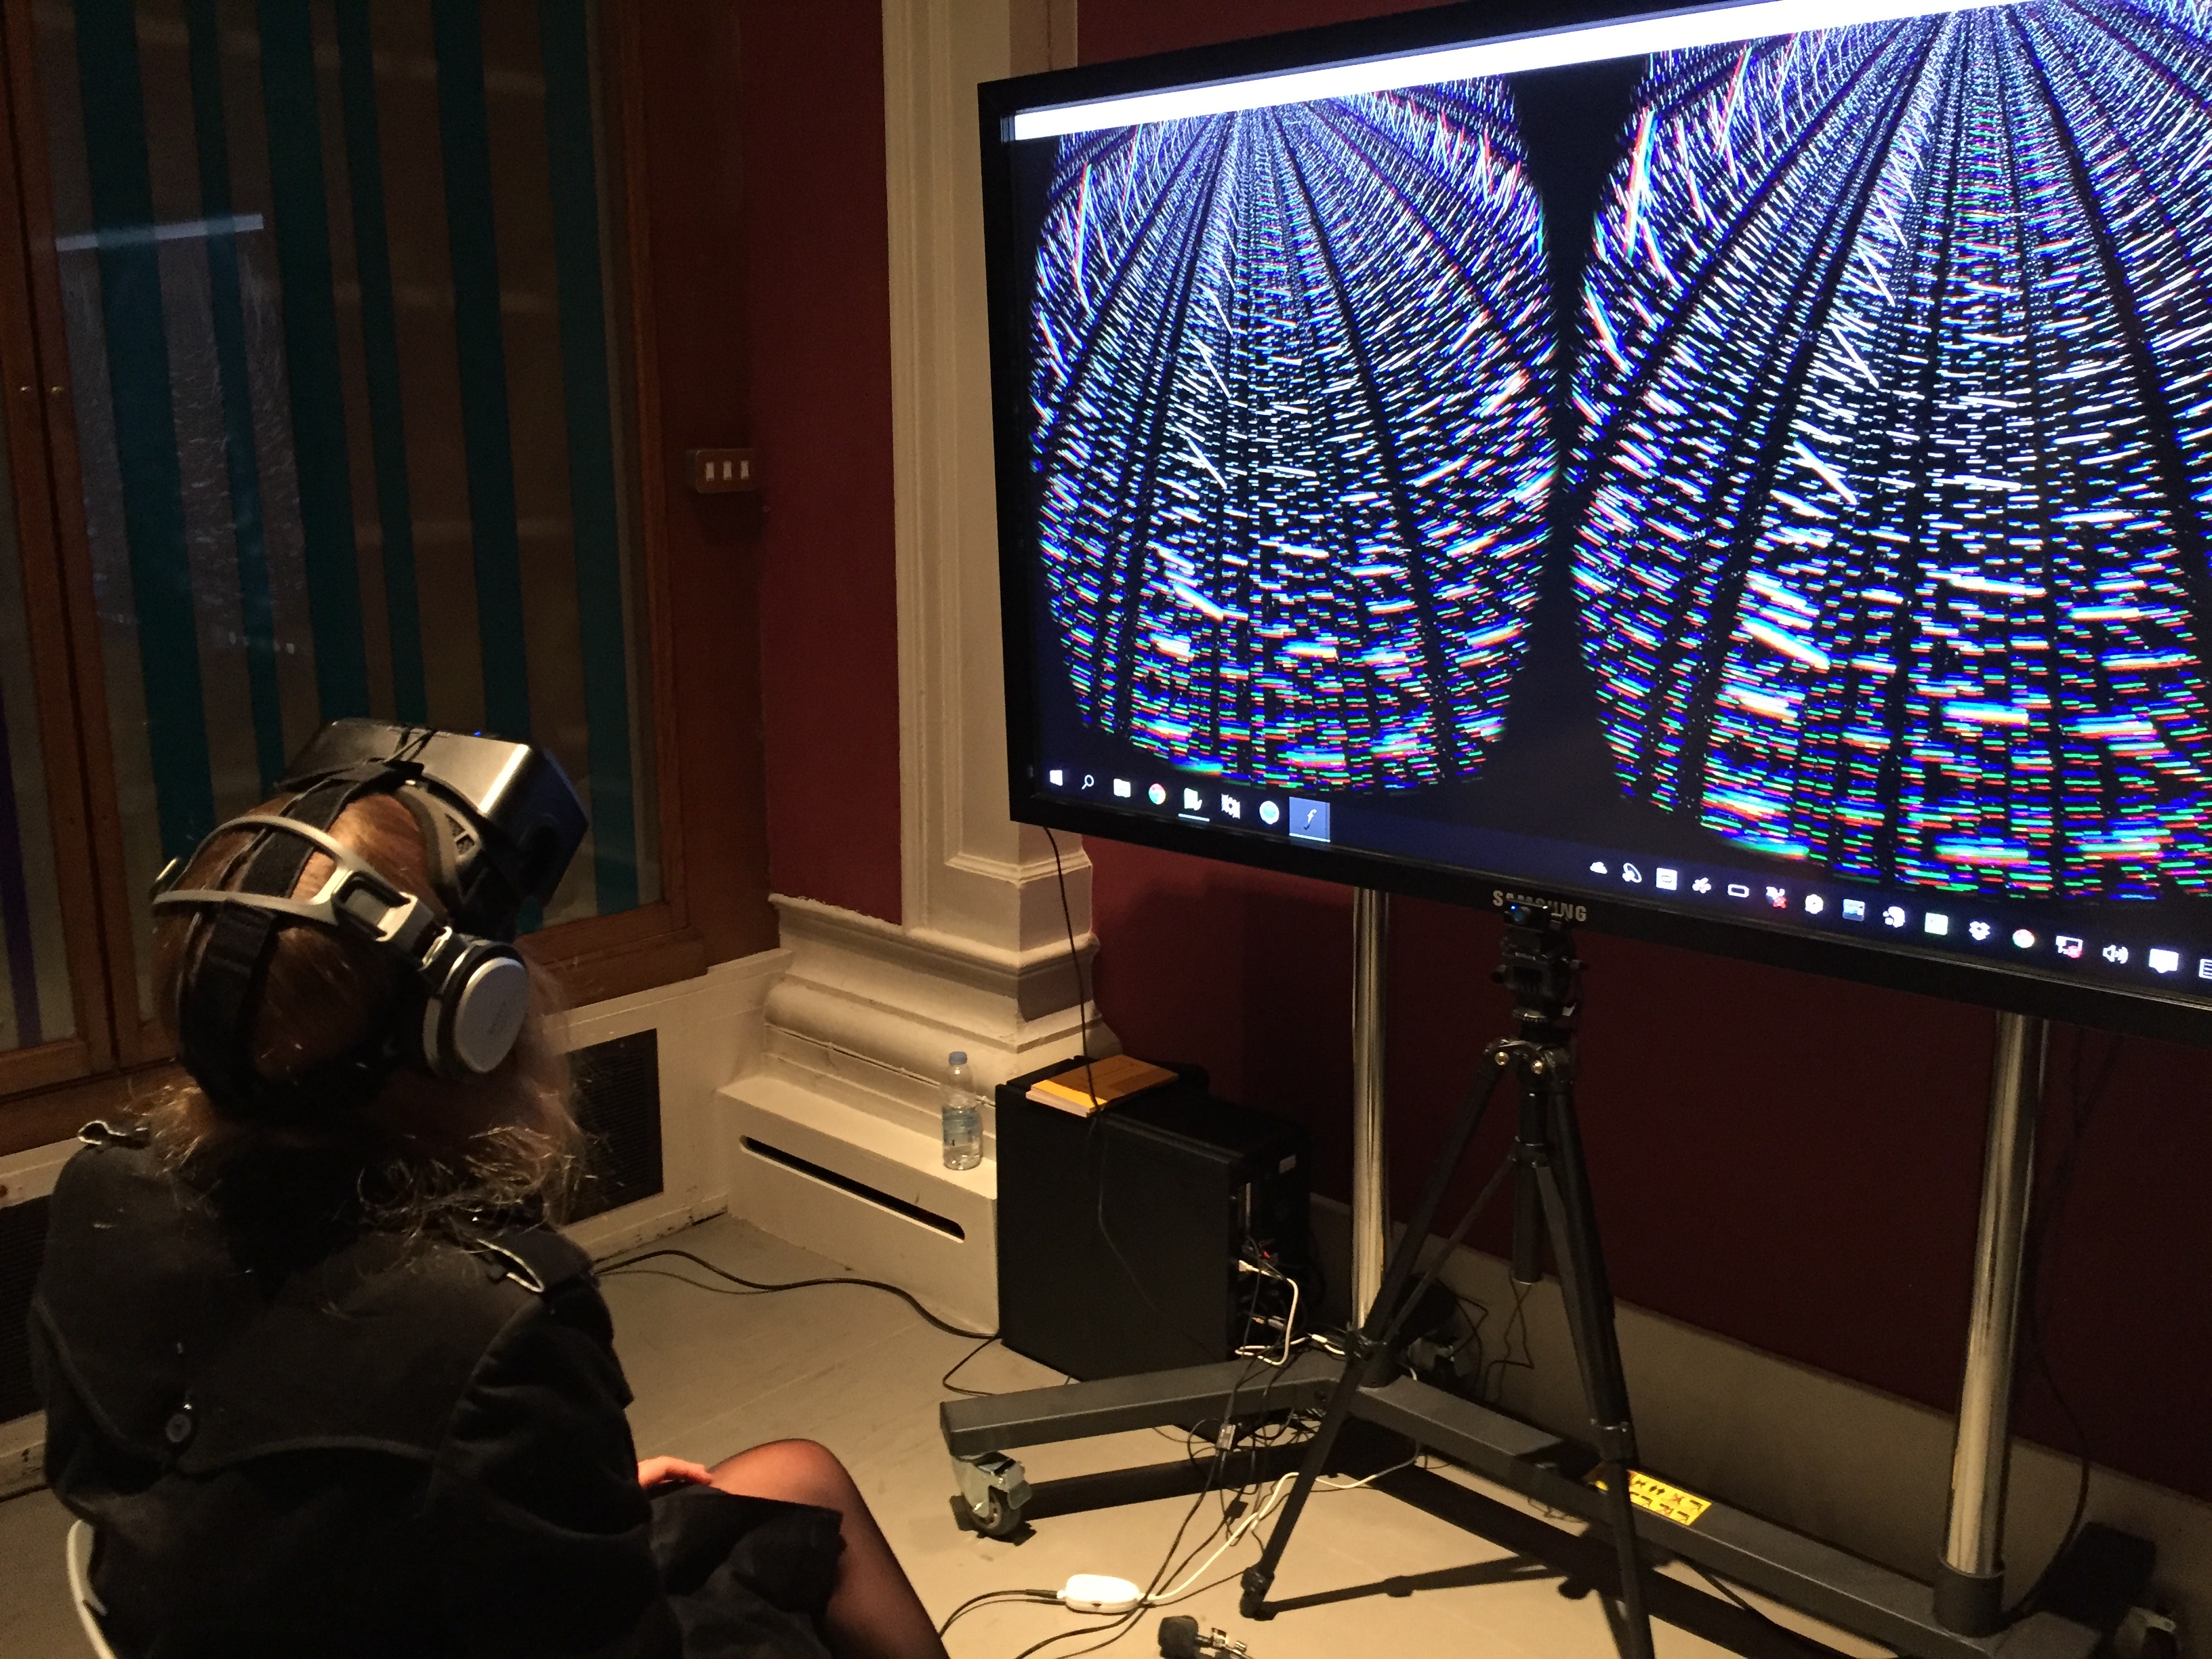
I went to the On Your Wavelength Exhibit in a railway arch at Bankside’s Immersive Arts Festival. It was fascinating. Fortunately I went when it was not so busy (my other Fine Art Digital colleagues who attended the day before were not so lucky). So I wore the headset that measured my brainwaves and stood in the pitch black before the huge circular portal into another World where my brainwaves created a unique light show.

Wavelength

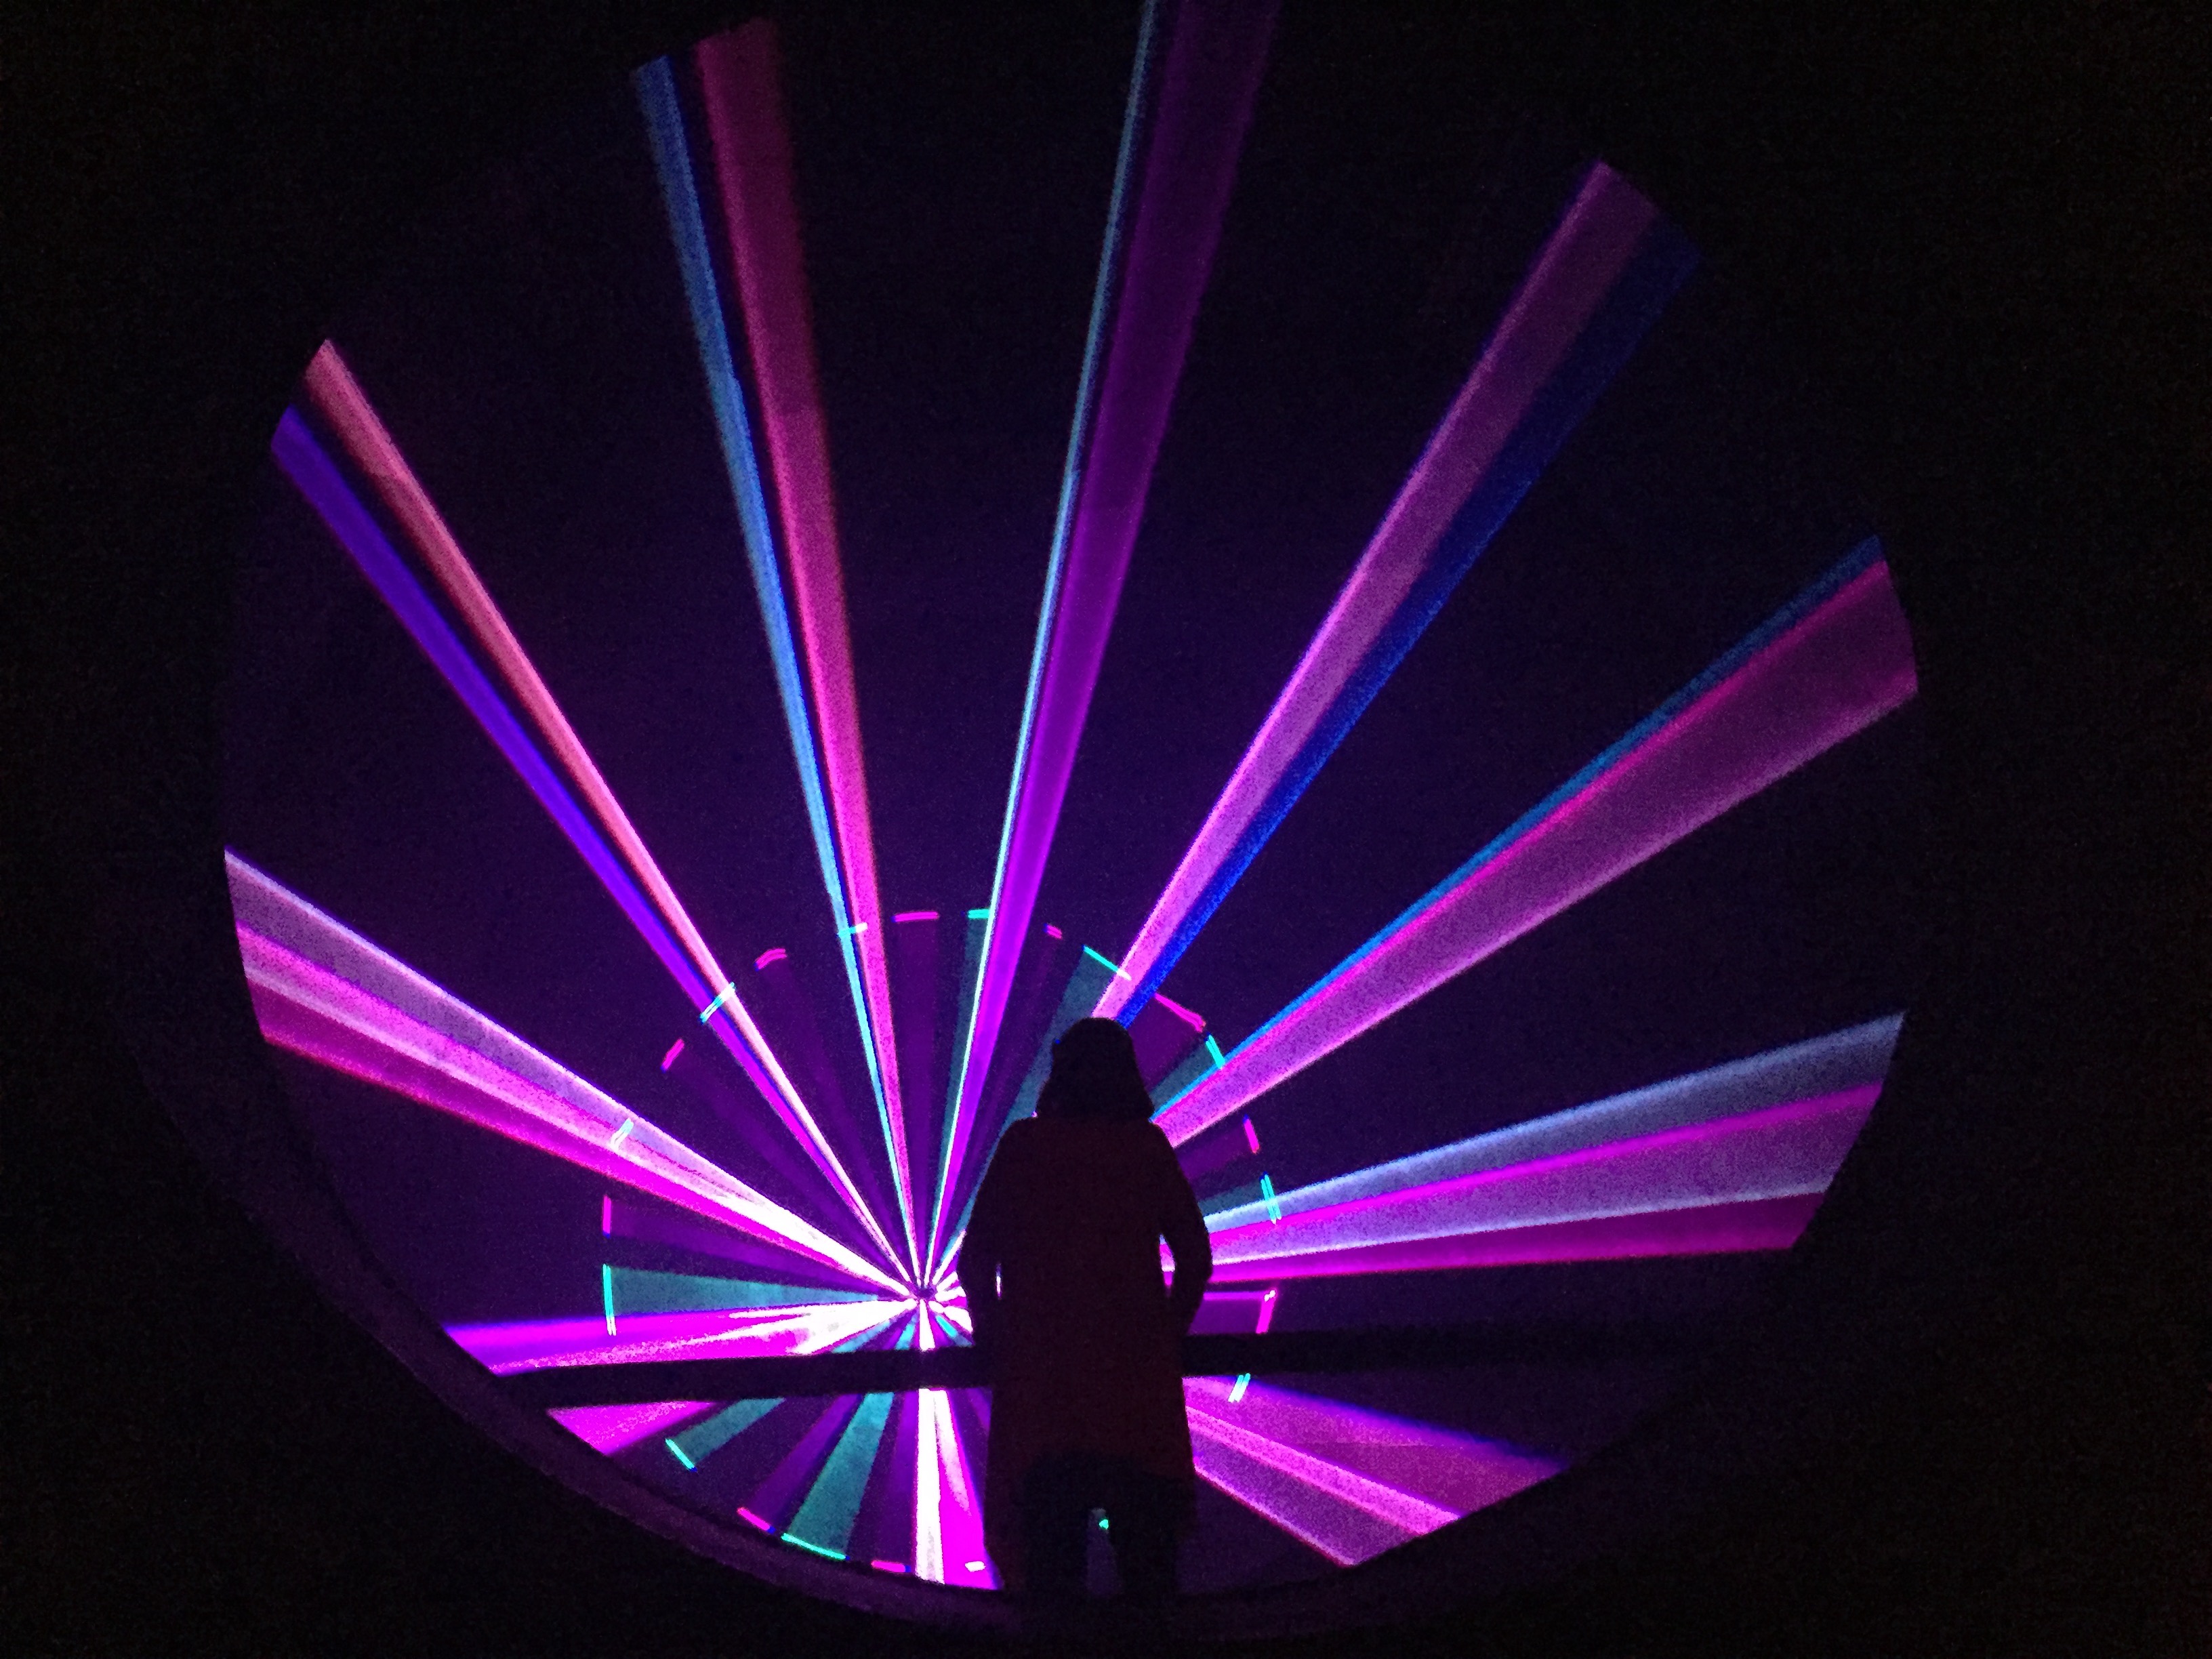
Angie who worked there and who had taken the time to explain the exhibit to me remarked on my show. She said that it made her feel happy. I said I was thinking about my family at my childhood home when I was very young (both my parents are dead and my father died when I was 13). I said that I was feeling melancholy. I then thought about something else which I am not willing to disclose.

What fun. Hugely impressed.

Talk

I also attended the first of Futures Talks – ‘Animating the Web’. Interesting but not Inspiring. I think because it was three young CCW alumni talking about their business start ups and most attendees wanted to be set alight by the actual talk topic which got them there in the first place.

I was impressed that one company now employed 15 staff, kept them in work, and were still solvent. No mean achievement. I was interested how they promoted their business (See Animade.tv) by using Blogs and Social media and little other different types of marketing and asked them about this during the Q&A.

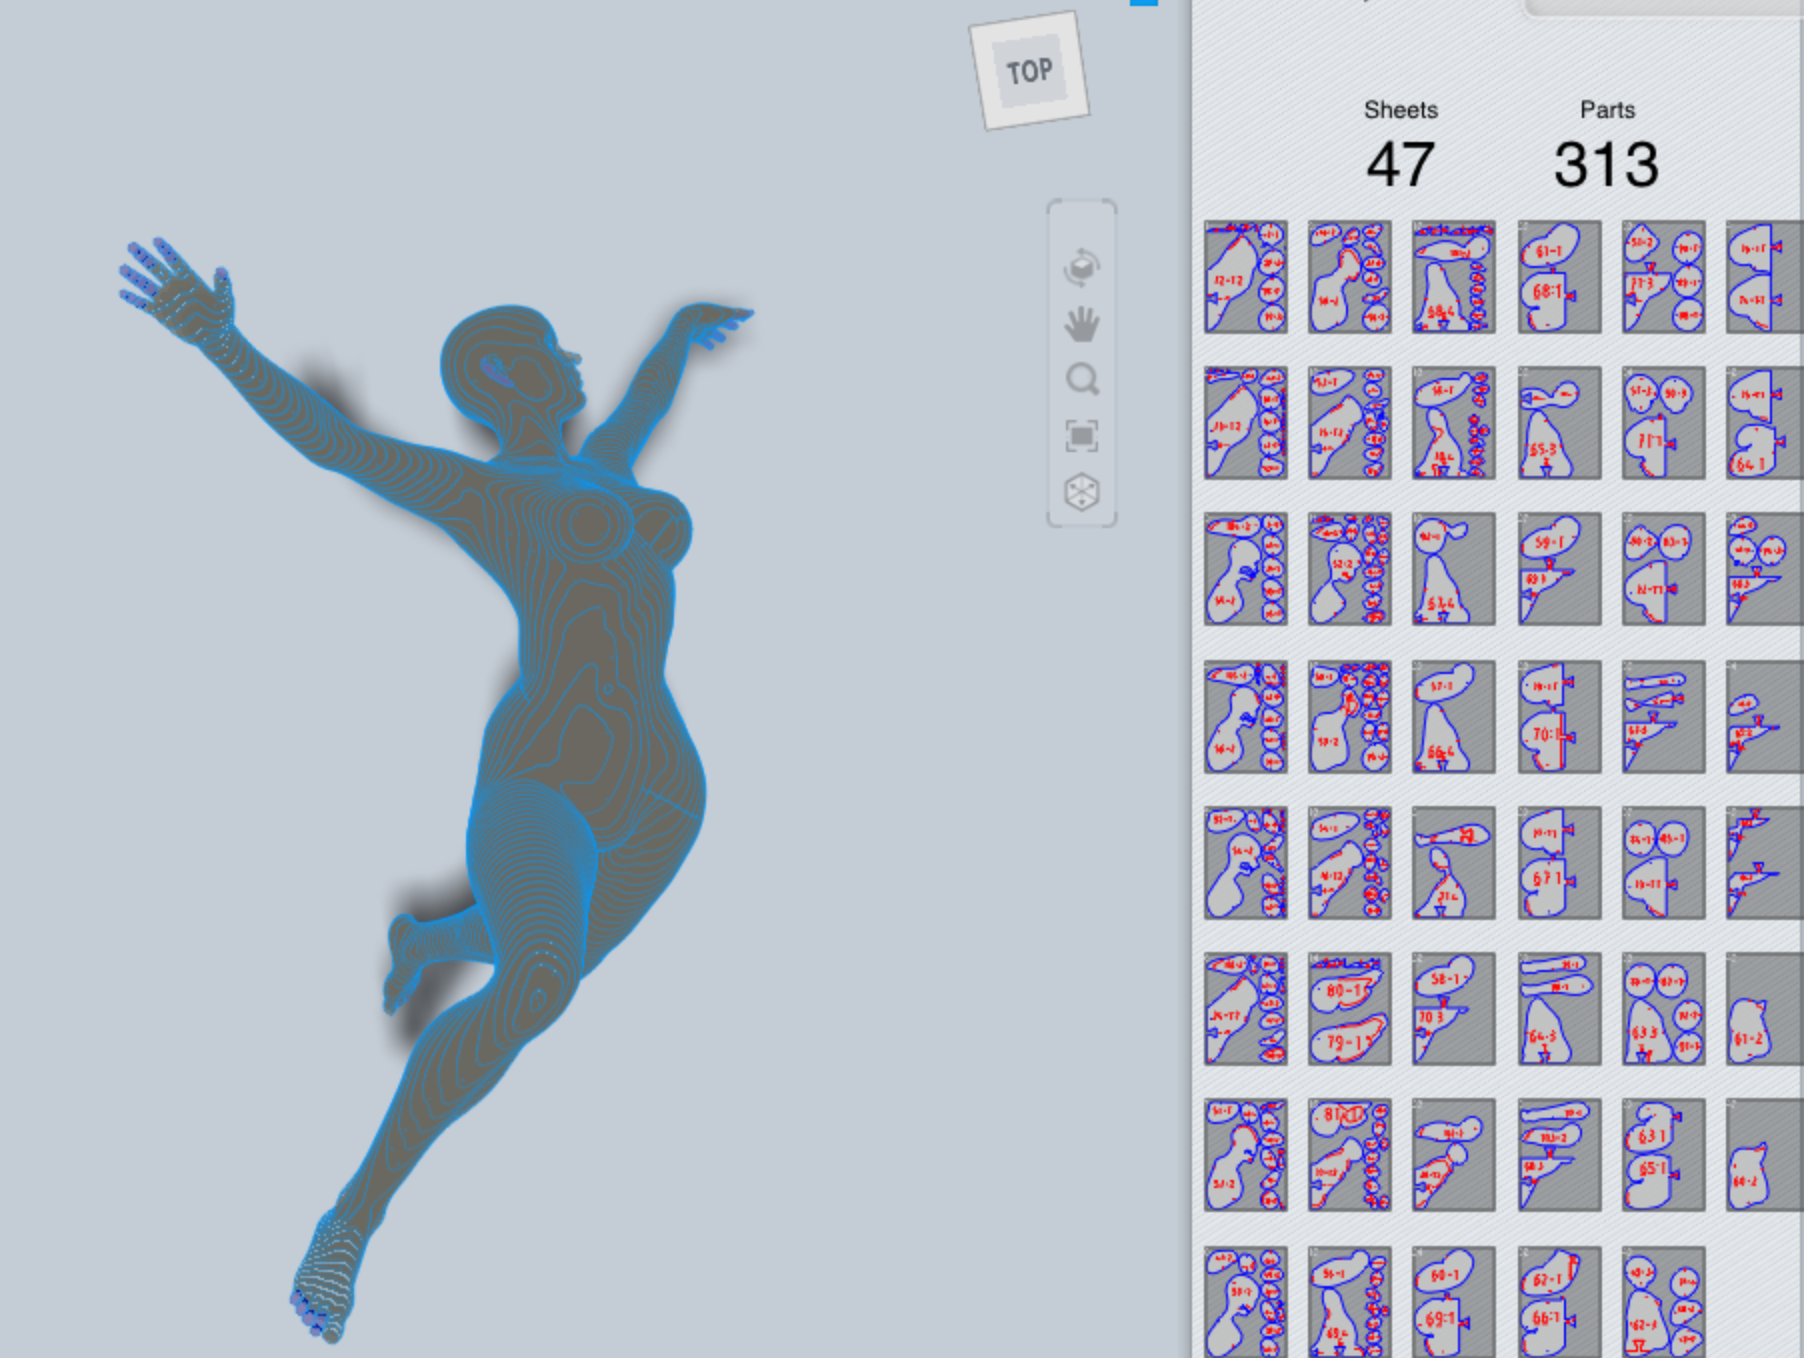
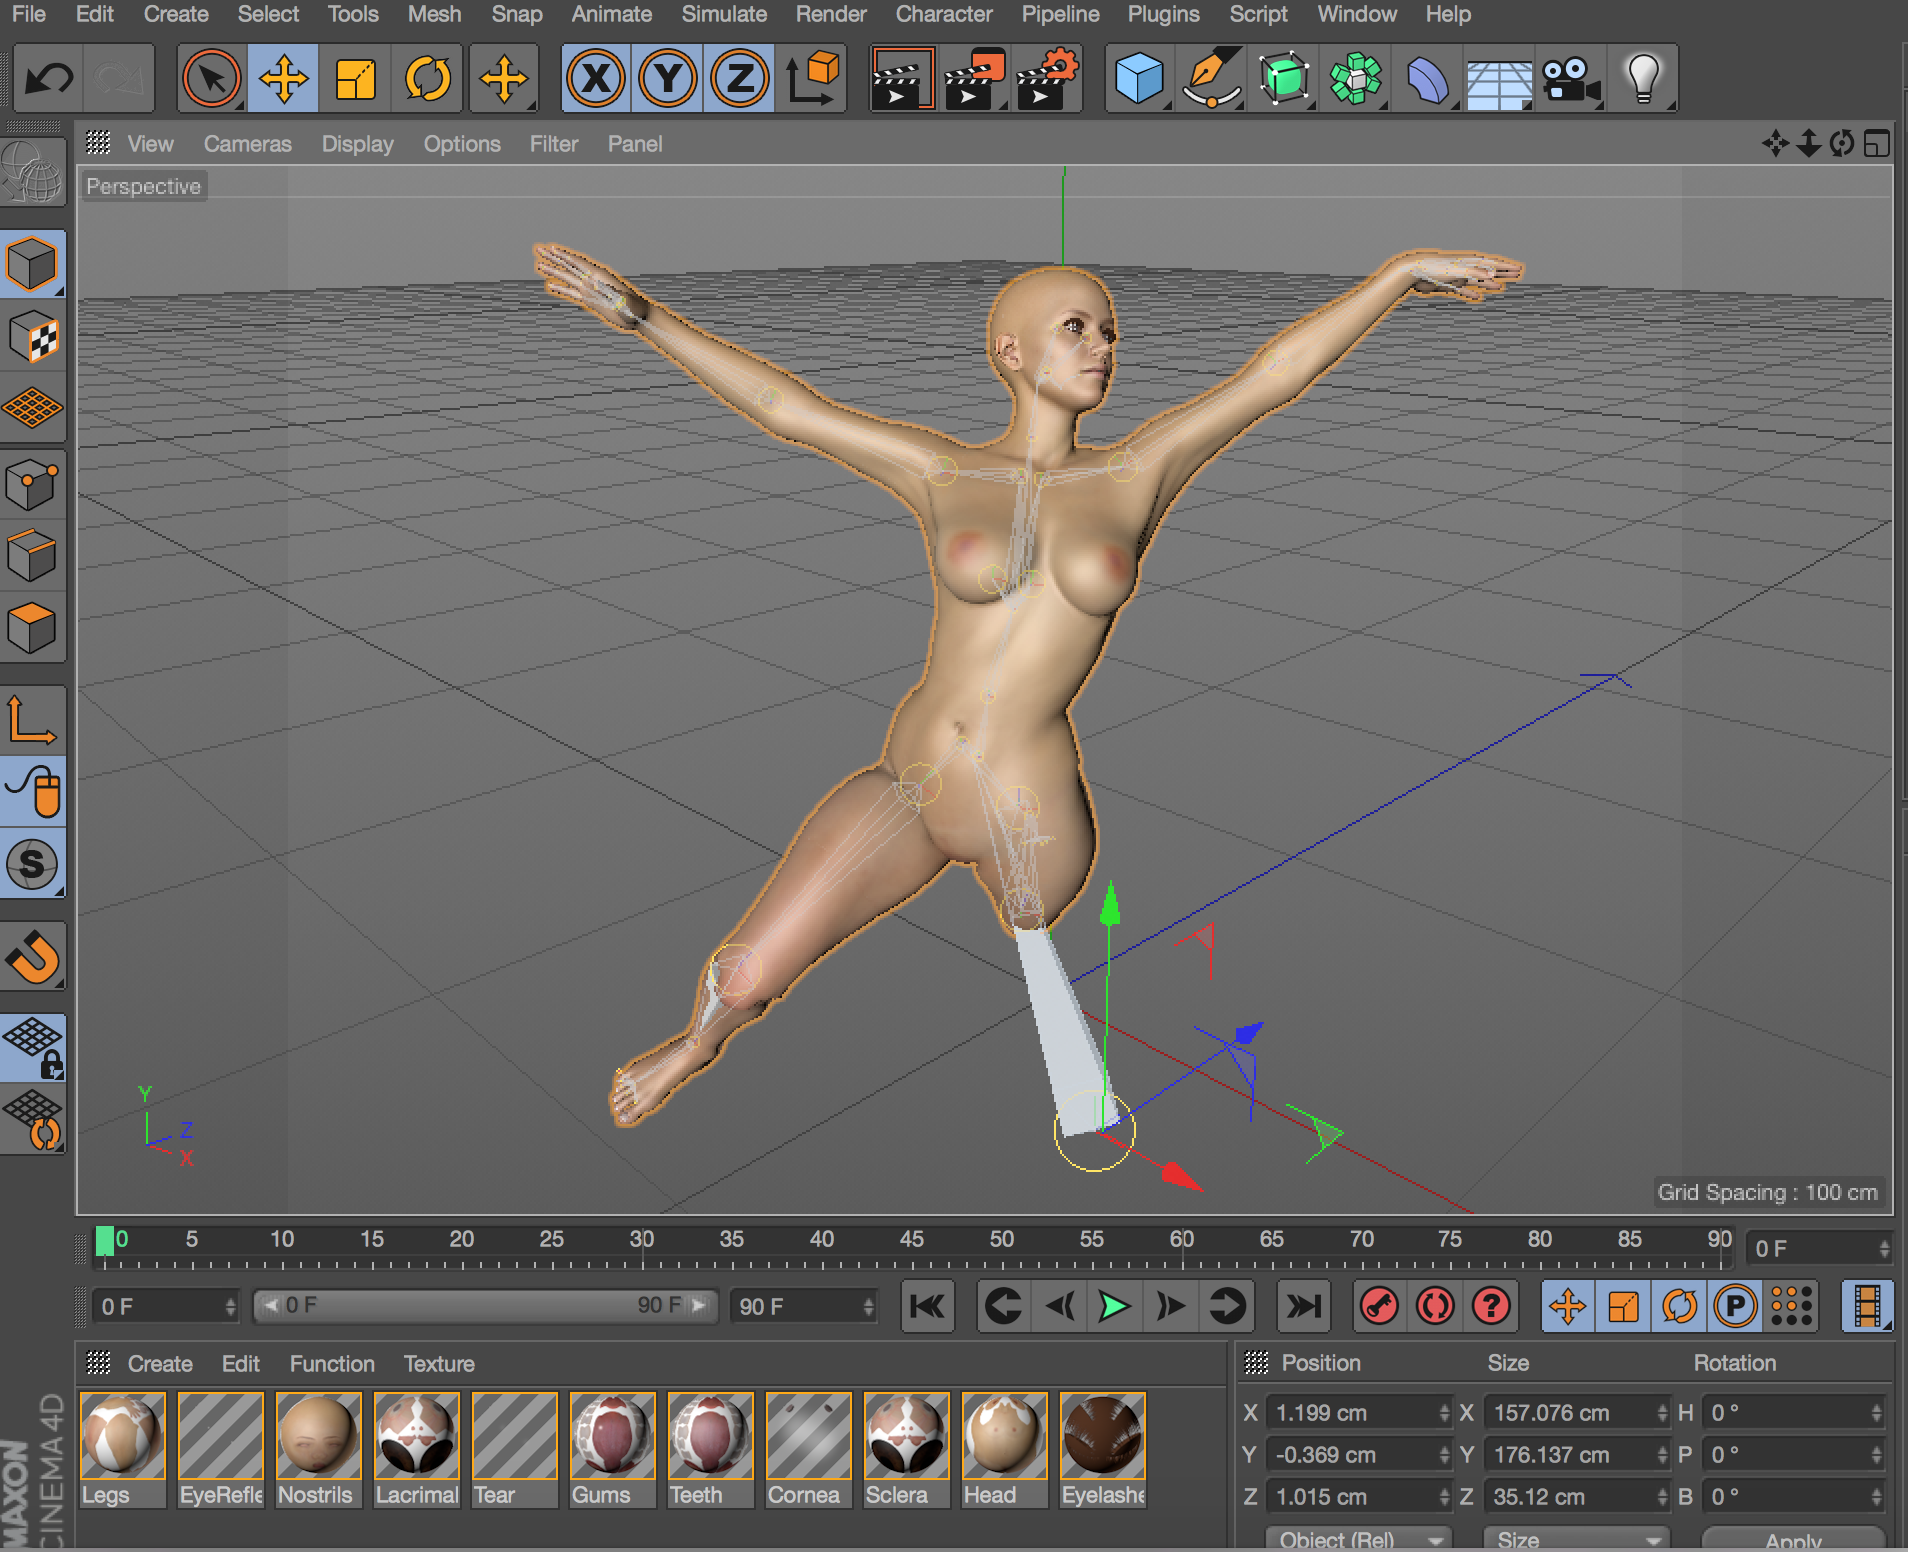
I also asked the owner of the other business (Squarespace who had innovative ways to teach coding supported by their own software) whether I could be controversial. As I got the nod, I said whilst I had experience of coding and building systems commercially (A lot – but I didn’t say that) my personal objective was to avoid coding if at all possible in order to concentrate on being creative not on the means to do so. I could achieve this by using shortcuts namely software (e.g. iClone) or examples I could easily modify (e.g Poser or Daz3D Market Place) or pre-programmed  microprocessors such as Arduino (e.g. from BareConductive). I suppose its horses for courses as another student in the audience remarked that she expected there would come a day when every child would be taught to code at school. I hope not. I prefer the HAL approach (Film 2001 – incidentally, move up one letter to the three in HAL and see what you come up with – I used to work for them) or a Robot (Film Ex-Machina) but then they did get emotional and kill their users!

In the pub afterwards Alejandro and I had a long interesting discussion (granted after several pints!). We expected more both of the Futures Talks and of the Dean. UAL has a huge reputation in the art World. If Oxford and Cambridge can invite the president of the USA to talk or debate why can’t we get World renowned Artists to come to our events?

I think after three pints we both said that we would club together and try!

My First 1-2-1 Tutorial

This first tutorial with Jonathan way surpassed my expectations. The main achievement was an academic direction for my study proposal: How artists past and present have adopted new technologies in their art practice and why, then use this analysis to contextualise the extension of my traditional life drawing into the digital World.

We reviewed my work so far: 7000 words on my WordPress blog (even I was surprised when I totaled them up) essentially writing up what I have done in my first 4 weeks on the MA; A first (incomplete) draft of my Study Proposal; A very simple mind map of my work plan showing completed work and tasks for the next 4 weeks (shown below); Illustrations demonstrating the first three of the five making projects for my first year and final exhibitions.

My first three making projects are: To show my starting point, an existing charcoal drawing of the model (Vanessa) who I am working with for the other two projects; A large floor standing life painting in an Art Nouveau style with snippets of the model’s narrative in her own voice played when different parts of the work are touched by the viewer; A large sculpture of the model made from sheets of MDF angled through the sculpture, and painted with light (projection painting) using a video on a continuous loop (possibly of the model going about her daily life – she is a classical dancer).

My aim is to bring my life drawing to life: It is no longer a static object to be admired in silence. The model is part of the work not just the object of it and the viewer can engage with it.

Study Proposal 1_2

Study proposal 2_2

Jonathan surprisingly said that from what he saw he was confident that I could achieve the first 3 of my projects . So my hidden thought coming back to his immediate reaction to my first study proposal presentation (see earlier blog) ‘Terry you have 5 MA’s there’ looks like Jonathan believes that I can do three. I wonder then does that get me 3 MA’s?! No need to answer that one. However, I said that to achieve the thrust of my study proposal I really need to complete the first four.

I was completely upfront and said while I was confident about the making side of my MA, I do not have an academic background in art or any art related qualification apart from garden design: Therefore my weakest area is determining lines of enquiry for the academic work necessary to contextualise my practice. As you can see from my opening remarks we pretty much resolved this even though it may need a little refinement. So I will start by examining the Futurist movement. The advice that Jonathan gave me is summed up in this recording (7 minutes – Please turn your sound to Maximum).

Now I need to make a start on research so that I can flesh it out for my study proposal submission on 3 November.

Not so fresh now!

Freshers

This was to be my first experience of Freshers. I turned up at Chelsea Uni Parade Ground at 5.30pm and it was totally deserted, with lots of huge completely empty marquees. I asked the security guy where the Freshers event was. All down the pub? Yes he said. “Not so fresh now”. He ho. Perhaps next year when I am not so fresh either!

Lots happening this week.

Lecture on Action Research

Jonathan gave a really thought provoking lecture on action research espousing critical refection. I didn’t get it before, but I do now. It’s much better when it is explained clearly in plain English and when the audience is engaged in thinking and responding about it.

Meeting to discuss implementing my study proposal

I had another meeting with Matt Edwards. He showed me around the Digital Media Centre and I leant him some of my toys to play with. The Occipital Structure Sensor – a scanner attached to the iPad mini, and a Leap Motion device. He later helped immensely by solving a problem I anticipated would arise later when I show the drawn 3D life model using a projector and the leap motion. I only want to see the model not all the icons etc around it when you view the model in C4D. The answer from Matt was:

“I’ve been looking into how you’d display your 3d model in an exhibition scenario. Quite straightforward really…You export the file out of C4D, ready to use in Sketchfab which is a 3D render viewer, the file will be hosted on their website. Then you can embed that file on your own website or Behance, which can be displayed in it’s entirety, very easily, and controlled with your LEAP motion sensor. See tutorial http://blog.sketchfab.com/post/51326826537/how-to-upload-from-c4d-to-sketchfab”.

Now that’s great Tech support! Thank you Matt.

Getting a ready made 3d animated model for me to paint

First of all its not easy. There are few ready made animations around particularly to suit my purpose and in C4D format. But I found one on Turbosquid. Sadly its in Maya. So I enlisted the help of Turbosquid (who want to sell it to me) who converted it to C4D for me but her hair does not stay attached to the 3D model. So she’s bald in C4D! Then I contacted my tutor on the 2 day one to one I attended recently, Matt O’Neill. He kindly offered to solve this problem for me. So soon I will have the starting point for painting a 3D animation in 3D in C4D/Bodypaint3D with my Intuos Pro Large Graphics tablet. So far I haven’t even used Bodypaint or the graphics tablet so this will be a baptism of fire! Here is the animation which I propose to paint:

Zoe rigged Pic

Making a sculpture using the Laser Cutter

Matt also put me in touch with the gatekeepers of the Laser cutter. Here’s a shortened version of what I sent Gillian Duffy and Neil Moonshine at the 3D Resource Centre in Wilson Road describing my project with the aim of meeting them to discuss it (and to get them excited about it). I included some pics which I have shown in my previous blogs so I won’t bore you with them again. I hope to get a response soon as this will be my first use of Camberwell’s making facilities and I can’t wait to start.

“I plan to produce a large sculpture formed of slices of MDF. I will be outputting a file from Autocad 123D MAKE and would be grateful if you could tell me what format this file needs to be in for your laser cutter. Firstly I would trial the process with a few pieces of MDF using a ready made 3D model just to check that I am going about it in the right way. Then I would make a smaller version of the final work also using a ready made 3D model. Finally I would want to make a 50-80cm tall model from a live scan using the process described below. A trial run in 123D MAKE of a ready made 3D model 50cm tall suggested that it would take 47 small sheets of MDF 1cm thick with 313 parts. For a larger model or less thick MDF (say 8mm) it would take more. I have never used a laser cutter before so have no idea what this involves but it sounds like it could take some time.

Step 1. Pose a ready made 3D model from Daz3D Market Place online and POSER software.
Step 2. Export this to 123D MAKE to produce the input to a laser cutter. This will be angled slices through the model.
Step 3 Use the laser cutter to make the head only as a trial run assuming the model was 50-80cm tall
Step 4 User the laser cutter to make another trial run of the whole model at say 30cm tall
Step 5 Make a scan of the live life model using the structure sensor I already have (I have lent it to Matt for this week if you are interested)
Step 6 Use the laser cutter to make the head of the live model at 80cm tall using 1cm slices of MDF
Step 7 Assuming step 6 is successful continue to use the laser cutter to make the rest of the parts for the entire model
Step 8 Assemble the model which would be similar to the photo below
Step 9 I then intend to paint the model with light (projection mapping) with sound. Please see clip of what this looks like (but on a model of a paper tiger). In my video the colours will change.
Step 10 Check this installation out in a UAL (hopefully Camberwell) location where the projection mapping starts after 2 minutes on a rolling cycle”

Projection Mapping

Tomorrow I attend a Skype tutorial from Alex May on ‘Painting with Light’. Here is the prep he asked us to do tomorrow morning:

1. Please test your Skype setup- I’ll be online 15-30 minutes before the workshop is due to start and will begin to add everyone during that time so we can all check our audio/video is working. Before this, if you could do a Skype test call to make sure your sound and microphone are working correctly, that’d be great! If possible, can you use headphones rather than speakers to reduce the possibility of feedback.

2. Install Painting With Light – Make sure you have installed the software before the workshop starts so we can get going as promptly as possible. I’d recommend using the very latest 1.5 version, which has some great new features that you will like! Download from: http://www.bigfug.com/blog/painting-with-light-1-5-1160-beta/

3. Use a projector, if you have one. Painting With Light is designed to be used with a video projector, and the tools will make more sense if you follow along with a projector attached.However, don’t worry if you don’t have one available – this won’t stop you being able to use the software.

4. Collect a few objects to use – As video mapping is all about projecting onto objects rather than flat walls, you’re going to need some things to project onto! Cardboard boxes and wood blocks are quick and easy but try lots of different shapes and materials. Not everything will be a good projection surface (dark and/or shiny surfaces in particular) but this is all about experimentation with the medium so use whatever you fancy!

5. Video footage – I’ll prepare a small archive of video clips for everyone to use during the workshop, but if you want to use your own images and video, or download things from the Internet (the newest version even supports animated GIF’s!) then please do. The only guideline you need to worry about at this point is making sure the resolution isn’t too big (not the size of the file, rather the number of pixels wide/tall it is). Even photos and videos taken on your phone might be thousands of pixels wide/tall so you might need to scale them down in Photoshop (for images) or something like Handbrake (for video).You can read more about the specific requirements in the Painting With Light manual, available at: http://www.bigfug.com/manuals/painting-with-light/

I will be using a few cardboard boxes and a statue of Buddha from my garden, together with my digital art projector. I will let you know how I get on.

Getting ready for scanning and painting the life model

I have now discussed and agreed with my life model Vanessa that she will also provide the voice of the model to go with my oversize painting of her in the Michel Canetti style. Scanning and painting is set to begin in the Cheyne Drawing Studio on 30 October. I can’t wait to get started.

Well its been a busy week including trips to Chelsea and Camberwell libraries to get some books on Art Practice as Research as a ‘light read’ during my week in Spain in a couple of weeks time.

I think I need a rest! So off to supper now with my wife to a local Italian restaurant.

Giving the Life Model a Voice

My study proposal includes a number of works which progressively illustrate the impact of digital on life drawing. My focus in this blog is my proposed over-sized painting in the minimalist illustration style of Michel Canetti. This is to be produced using a traditional charcoal drawing from the life model displayed large on the canvas using a digital art projector. The purpose of the projected image is to maintain perspective when working close on a large canvas, and to mark out the areas where you decide to paint.

IMG_9204

Michel Canetti’s work has been displayed at the Saatchi gallery in Chelsea, London. He is famous for his fashion illustrations while working in Paris where he trained. These were prolifically published in Vogue and many other quality fashion magazines, and the originals are now very expensive collector’s items. He lives in Melbourne where he has a studio and is booked many months ahead on commissions for his huge minimalist portrait paintings mainly of his female clients. He now only exhibits his work there and in Canberra. I have been in direct correspondence with him about his approach which I am attempting to follow. I quote “Dear Terry, Yes you could use a projector to draw your limits of paint. It’s a good technique…..Kind Regards, Michel Canetti’ (24/01/15 an extract from LinkedIn correspondence between us).

Michel Canetti

I have now arranged for a model to sit for me over two afternoons in early November at the Cheyne Drawing Studio in Chelsea. Her name is Vanessa and as well as being a professional life model she is also a classic dancer. I aim to draw her in Charcoal on A2, which I will project on to a large canvas in another studio (possibly at UAL) where I will paint her in the minimalist illustration style I have referred to. This will be in a very limited set of colours, mostly black, white, and grey with a small splash of colour such as on her lips or eyes. I will also ask her to say something about herself and voice record her speaking about her feelings before, during and after the sitting. Later I hope to record her comment on the finished work.

I intend to use some special paint, which will be linked unseen behind the canvas to an Arduino micro processor. When the viewer touches specific pieces of the painting they will be able to hear the model speak. I am indebted to Grace Attlee who has just joined MA Illustration and works at BareConductive in London, whom I first met at our Welcome event for MA Visual Arts Camberwell. BareConductive supply conductive paint and the means to link it to microprocessors such as the Arduino. Last weekend they had an exhibition of their BareConductive Playground at the London College of Fashion, Mare Street Campus. By chance conversation Grace introduced me to the idea of possibly using her company’s products in my work.

Thus I aim to give the normally silent life model a voice in my work.

Awards and Exhibitions – Highlights, Serendipity and Dilemmas

This week several students watched the 2015 Lumen Prize Ceremony in the comfort of their own home while at the same time maintaining a group dialog with Jonathan’s concurrent Skype session. This worked amazingly well and it was really interesting to get everyone’s comments and participate in a live discussion as the ceremony took place. Alasdair actually managed to attend the event itself.

A small group of mainly first year MA Fine Art Digital students also spent the day at the V&A (many thanks to Alejandro for organising it – we now have a WhatsApp group for these trips) for The London Design Festival.

There are far too many fantastic exhibits to highlight so I will just include my own personal favourites.

At the Lumen event there was a heavy leaning towards data driven projects particularly during the presentations before the awards. I am sure that those presented had great thought behind them but artistically I felt that most had low impact visually.

One prize winning installation stood out for me – ‘Forte’ by the lab 212 collective in France. They used a church, ceiling to floor strings along the aisle between the pews, and a digital self playing grand piano near the alter to produce an interactive work. Pluck different strings and the piano plays random snippets of compositions by one of the group. Take a look.

Compared with the Lumen prize data driven projects one at the V&A completely blew me away. This was a case of serendipity. I was looking at the V&A programme and saw the name Alex May, who I have mentioned before in a previous blog and who is conducting a Skype seminar on ‘Painting with Light’ (projection mapping) that I am participating in this coming Saturday. I contacted him and found that he was exhibiting and he was there with a colleague Anna with an installation called ‘Sequence’. So I went with the group to meet them and see their work. It was AMAZING!

IMG_9301

A picture of Natalie wearing the Oculus Virtual Reality Headset and headphones
The screen gives only a 2D representation of the 3D view through the VR headset.

I quote verbatim from the description of their work. I cannot say that I understand the medical science behind it but I get the gist. ”Sequence’ is a bio-digital installation which investigates the emerging technology of whole genome sequencing of bacteria, which made it possible to study the entire genetic blueprint of an organism …. and how infections spread.’ Given the fact that both Alex and Anna are Artists and not scientists even with the help of Oxford University and others, they had to get to the point where they understood and could implement the whole process…then present it artistically.

Anna ‘learn’t how to sequence an entire bacterial genome… including the sequencing of around 2.8 million base pairs of DNA of the Staphylococcus aureus bacteria….’ which lives in her (and our) nose. This data was then assembled and presented using software’ (written by Alex May in C++)’.

The funded project took around 18 months to complete. Sitting with the Oculus headset and headphones on you were totally emerged in the middle of the DNA sequence. If you looked up the 2.8 million base pairs projected miles up into space. If you looked down it was like looking at them down a deep mine. You could explore the genome sequence left and right through 360 degrees. The headphone provided explanation but the effect was far beyond my basic description. Just out of this World.

Next I was also able to live broadcast a message from the V&A to 6 installations in Mexico City and a dedicated local radio station there.

My final ‘pick of the week’ was the installation ‘Curiosity Cloud’ by Micher’Traxler, a work sponsored by Perrier-Jouet, ‘whose label motive is connected to the Art Nouveaux movement, and the traditional use of insect and butterfly motifs throughout this period’ (quoted verbatim from the V&A guide to the exhibition). It was a sensual and interactive installation with its viewers.

If there was nobody in the room it would be in darkness. As you enter, hanging sensors throughout the installation measure the level of heat and the position of visitors walking through the centre of the work. This lights up lamps in the vicinity, and controls the light level and speed of insects and butterflies flying within the hundreds of over-sized light bulbs hanging from the ceiling. Take a look and listen as the insects hit the inside of the glass as they fly.

And finally to the artist’s dilemma. I attended lectures ostensibly on ‘copyright’ but these were far less dry than I expected. From a theme ‘How does an artist eat’, the speakers contrasted and illustrated the wide use of other artists’ work in their own compositions (or vice versa). Dr JR Carpenter presented a slide quoting Jonathan Letham ‘All art exists in a continuum of borrowing’. Eva Weinmayr presented her ‘Piracy Project’ where she illustrated many works which were almost blatant copies of some other artist’s work. One was a book printed word for word with the same cover as the original famous author with a 50,000 print run which now sold for 20,000 US dollars each as collectors items – many times the original author’s royalties. Smita Kheria’s doctoral research project collected the views of artists, agents and other representatives of the industry to understand their views and requirements on the issue of ownership, copyright and payment. Some artists were happy to ‘open source’ their work. Others did not want payment for the incorporation of their work in that of others, but insisted on acknowledgement. Another group wanted to control distribution tightly, protect their copyright and get paid for its use. Most believed that they had little or no control of the distribution of their work, how they protected their copyright, and even how they got paid for all of its use. A view expressed earlier by Alex May who wondered how he might get paid in future for 18 month’s collaborative work.

I opened the panel question and answer session with a suggestion that there might be lessons to learn from the software industry and did anyone have any views on that. For example, some software authors were happy to offer their work as ‘open source’. While others tightly controlled distribution and payment through watermarks, not being able to save or copy, serial numbers, etc. JR (as she was referred to by the rest of the panel) said that anyone who was capable of copying her protected work on her website was welcome to it. She even taught student’s how to do it! There were no constructive arguments to the contrary either from the panel or the audience. A huge business opportunity for someone I think.

The other dilemma came out in my earlier conversation with Alex May. Most digital installations rely on other commercially available or open sourced software and hardware. It changes. How does your digital work or installation keep current? Otherwise it probably does not work any more. His view was that we must be losing large swathes of works from the past that are now sadly redundant. The lights go out on your precious and hard work.

I have no answer to this. Do you?

My Study Proposal – Checking out what is possible

I met with Matt Edwards today, one of the senior technicians in the Digital Media Department in the old building for post grad students at Camberwell School of Arts. Following Jonathan’s comment that I had 5 MA’s in my proposal (see my earlier blog) I needed to check out what is possible in a single MA (haha).

First I was delighted to find that Matt is a graduate of the same MA course that I am on. He is also now furthering his studies in order to teach. So I value his opinion as an artist and one who knows from experience what the course demands as well as someone who can provide technical support and advice. He is also very approachable, knowledgeable and enthusiastic.

When I first described my study proposal to Matt he was inclined to agree with Jonathan, but by the end of our discussion HE THOUGHT THAT I COULD DO IT ALL! That is great news but we will see. I think that I will set out a more limited set of projects in my proposal and see how I progress. If I am well ahead in year 1 then I will press on with the remainder of my projects as outlined in my video.

I explained my approach to simplify the tasks ahead and make them much more manageable: If anything will take me more than a day or two (preferably an hour or two) to learn the basics (not to become proficient) then I will automatically reject it as impractical for my proposal. I explained that was how I looked for and found AUTODESK 123D MAKE when Cinema4D (C4D) can do exactly the same thing. C4D is very comprehensive and generalised so that it can be adapted by many different users for their own specialisation and desired outcomes. I would therefore have to learn more complicated tasks than I care to and the C4D method for making an input to a laser cutter is also very long winded and repetitive. So I looked for and found a short cut namely AUTODESK 123D MAKE which took me 30 minutes to learn and I was able to demonstrate to Matt.

I was pleased to discover that at Wilson Road we do have the Laser Cutter I need to make my sculpture. Matt did say that this is very popular device so to get in quick. He said that most of the foundation students there use it for making far simpler objects than I had in mind and the technicians there might find my project quite interesting. Advice that I will definitely take by first meeting the technician responsible and explaining my project. Another task for next week.

Matt was hugely interested in some of the technology I demonstrated and wants me to show it to his head of department, which I agreed to do. First of all he wants me to show the Occipital Structure Sensor attached to my mini iPad, and how I use it and Itseez3D cloud services to produce a textured 3D model of a person or object. This model is of very high quality and can be made in the classroom in less than 10 minutes.

FullSizeRender FullSizeRender(2) FullSizeRender(3)

The Structure Sensor -A very quick (3 minute) scan (of me) by a first time user with no experience

Matt would also like me to show how this 3D model can be exported to other 3D software such as C4D or 123D MAKE in less than 15 minutes.This is another example of finding shortcuts which in this case means I do not have to learn or become proficient in C4D 3D modeling or sculpting.

I explained that my main time consuming tasks would be physically assembling the sculpture and in particular learning to paint 3D models in 3D using C4D’s Bodypaint 3D and the Intuos graphics tablet. I need to produce non photo-realistic 3D life drawings in charcoal effect (to limit the use of colour – as more learning and practice is otherwise needed!) to the same standard as my traditional 2D life drawings (see below for an example). But this is how it should be – focusing on producing Art not on the technology.

Terry_0012

In my 3D painting the above drawing would be capable of being progressively rotated so that you would see the same posed drawing from all sides. You cannot do this in 2D as you would have to make another 2D painting from scratch for each view you wanted to look at. Whilst there are examples of other artists’ work in this area I could find none that worked from life to produce an artistic rather than a photographic or photo-realistic result. That was after long days searching on the internet. So I think that I am breaking new ground here. If anybody can show me a 3D charcoal drawing from life that can be rotated by the viewer please let me know.

I was delighted to find that the Digital Media department not only have and know about the Intuos tablet but they also have a Wacom Cintiq tablet (which allows you to draw on the tablet itself rather than the Intuos which effectively uses a pressure sensitive pen as a mouse for the computer that it is attached to). So they can help me set these digital tablets up and become familiar with their use. Very useful as at present, even though I have a large Intuos Pro, I have not used either! The MA Illustration students know all about this so perhaps (PLEASE) they might offer to help me too.

I have taken the same approach for producing a drawn rigged and animated 3D model. Except this time the model is taken from those sold commercially and offered in a format acceptable to C4D, usually from DAZ3D or Turbosquid where the model can be posed using software called POSER 2014. This software is comparatively very easy to use (I have experimented and produced results using DAZ3D in less than 30 minutes – see my last blog).

With rigging and animation thorough checking is required before you buy them ready made as outcomes can range from it works out of the box to minor tweaking or major effort and skill to make it work in another software package from which the acquired model originated. However, you don’t have to do the checking. Turbosquid for example will do this for you for free. Then avoid anything that needs a lot of work or skill. Try to get something that works out of the box in your chosen 3D modeling package (in my case C4D). So again you can concentrate on painting the UN-animated view of the 3D model as before. Then run the ready made animation this time with your painted model and export it to iMovie (as I did in the crude example in my video blog). So again a shortcut rather than a massive learning curve. More on this in a later blog when I will show my experience finding a suitable animated model on which to base my work.

As Matt pointed out to me this is a valid approach as in the commercial world and due to the complexity there are specialists in C4D as with any other 3D modelling software package. For example, in modeling and sculpting only, in lighting only, or rigging only etc etc. So my chosen and very limited specialisation is …. wait for it …..C4D life drawing in 3D employing only a non-photorealistic charcoal effect and no background or a 2D one from a photo. This is as much as I can cope with if I am to be realistic about including this project in my study proposal.

We also talked about Leap Motion where the viewer can in my case rotate the drawn 3D model at a distance with hand gestures. I am glad to say Matt has taken the Leap Motion out of the box (I haven’t), deployed it and says is easy to use. So hooray, more help available here too.

Thank you Matt. We are meeting again next week.

I am encouraged.

Scanning and drawing a Life Model in the studio

I am really excited (and relieved) that I have been able to arrange this as I was not sure that it would be easy to get a professional life model willing to be scanned as well as drawn. It’s not something they usually do.

My plan now is to complete this part of my project before Christmas, and if I can before the end of our first term. My model has sat for me before and her name is Vanessa, a professional life model and dancer in theatre musicals Internationally including London. I am booking two or three sessions at the Cheyne Art Studio in Chelsea.

IMG_9049

My last drawing of Vanessa

My tutor for this work is Richard Colson, a professional artist and leader of the MA Computational Design course at Ravensbourne, London which is well known and respected as a specialist University (moderated by the University of the Arts London) in all forms of digital media.

I will set a pose similar to below and make a full body 3D scan using the Occipital Structure Sensor on my iPad mini and the cloud based scanning service of Itseez3D. I will over two or three sessions produce three or four charcoal drawings, and fast camera photographs through 360 degrees around the model.

                   IMG_7722 (1)

Scan of another model at Cheyne drawing studio, Chelsea

The scan will allow me to produce another sculpture but from real life instead of from a ready made 3D constructed model (see previous blog).

The photos and drawings will also eventually provide the means to produce a digital 3D painting of the life model without her being present. It is not practical for me to draw the model in 3D directly from life in C4D. This is a step too far for me and would take too many life drawing sessions to be a realistic proposition. Besides I have not yet used or made a brush stroke in C4D so it would take forever to do it this way with me as the digital artist! The digital 3D drawing will be in charcoal which can be rotated 360 degrees in Cinema4D (C4D) on my MacBook Pro and projected large on a wall using my Digital Art Projector. This will be the subject of a later blog.

To be continued next week

Colleague Suggested Research

I am grateful to my fellow online students who, following the video presentation on my proposals for my MA, made some useful research suggestions which were also endorsed by Jonathan. These were works by the artists Isaac Cordal and Karin Sanders.

I found their exhibits very varied and not all to my taste. Some pieces however were very interesting for putting my work into context with that of other established artists.

Isaac Cordal’s  work displayed in October 2011 at ENCUENTROS DIGITALES in Madrid was most relevant. See link http://cementeclipses.com/Works/918/. The picture and text below are quoted verbatim from the display.

Isaac Cordal at Encuentros Digitales, Madrid Oct 2011

“The feature comprised of three visages (shaped from pieces of metallic grid mesh wire) hanging from a motorized cable spinning horizontally. At first these installations seem regular but by looking closer it becomes apparent there are small optical confusions caused by the form of the objects projected shadows. Through an LED light positioned a few feet away from the hanging features, the light passes through the wire mesh, constructing facial outlines that are cast out as its shadows are projected in a large window of wall space centrally located in the darkened room. The projections become an interesting drawing that recalls a 3 dimensional representation of a computer constructed model. The movement of the pieces confuses the human perspective due to its projection having concave and convex forms. This work I have tried to carry out of the simplest form to try to reduce to the maximum the use of technology.”

This work alludes to a 3D computer constructed model and could be seen as similar to my idea of projecting a 3D painting in 3D. However, my idea is to paint on an actual computer 3D mesh so that it looks like a conventional (non photo-realistic) life drawing or portrait which can be viewed in 3D in various ways (without 3D glasses) including a holographic display. Thus I aim to confront and use to the maximum the technology that Cordal hoped to avoid or minimise. I want to explore the extent to which digital means can be used to make and present my art, primarily of the life model.

Closer to my objective is some of the work of Karin Sanders presented at GALERIE HELGA DE ALVEAR, Madrid in March/April 2000.The pictures below are from the exhibition, and the quotation is verbatim a description from a contemporaneous article by Charles LaBelle (with much of the critical review omitted – he was not very keen) in Issue 51 of Frieze magazine.

Karin Sander's exhibit at Galerie Helga de Alvear

Karin Sander's Self Portrait Model

“Sander’s exhibition was titled simply ‘Escala (Scale) 1:10’. Throughout the two rooms of the gallery, Sander presented 50 figures, each rendered realistically in plastic and shrunk to one-tenth their normal size. Frumpy housewives, chunky businessmen, a football player, a ship’s captain, a couple of kids, a bald man and his blind wife, a middle-aged guy in jeans, a diva in a purple gown, a Gen-X girl in bell-bottoms, all stared out from their individual acrylic cases, frozen like inhabitants of a sci-fi force-field. Indeed, the show, at first glance, reminded me of an old Star Trek episode in which an alien race has collected various species from across the galaxy to populate a high-tech zoo.

Fabricated out of acryl-nitryl-butadien-styrol by Glats Engineering in Germany through a sophisticated process of 3D body-scanning and ‘fused deposition modelling’, the carefully airbrushed figures are incredibly intricate. Small details, from crow’s feet to shoelaces, are precisely moulded. Only the striated surfaces give any hint of their digital origins.

Hand-picking her subjects, Sander allowed each to represent themselves as they wished, to choose their own attire and stance. Yet, participation also entailed an act of submission which necessitated an especially close engagement with the artist – one that seems more akin to that of doctor/patient than artist/model – involving a journey to a factory in Germany and a ten hour scanning procedure.”

The technology has changed a lot since 2000. Each of Sander’s subjects was subjected to a 10 hour scan in a specially technically constructed space. My scanning uses a hand held device and takes minutes anywhere using cloud computing. The construction of each model in plastic was a very expensive process and broadly equates to low cost 3D printing facilities available today. Nevertheless, Sanders is presenting a (clothed) life model in a similar way to my 3D sculpture in sliced MDF.

IMG_6603 (1)

My intended presentation of this work is different to that of Sander’s. It will be part of a collection of differently made and displayed works progressively illustrating how digital technology can extend the artistic representation of the life model beyond traditional life drawing or painting. In this example the sculpture will also be painted with light using a technique called ‘projection mapping’. I am not sure that Charles LaBelle would approve!

Thanks again to my student colleagues and to Jonathan for stimulating my interests in these artists.

Getting Started – Making a Life Sculpture

My first steps were to choose the software needed to make the sculpture and then to try it out.

Software Choices

Before joining the MA course I had already extensively researched the available software for making the sculpture and selected:

  1. The Occipital Structure Sensor with the iPad mini and ItSeez3D cloud services for scanning a live life model
  2. DAZ3D for their ready made 3D models, and POSER for its ability to pose the model as I wanted, and
  3. Autodesk 123D MAKE to produce the instruction input to a laser cutter

The reasons behind my choices are explained below:

I have experimented with the Structure Sensor (similar to a Microsoft Kinect but attachable to an iPad) with their 3D scanning software but found the latter did not have the quality output I had hoped for when used on a full body scan. This was because their scanning software ran on the iPad which is not sufficiently powerful.

So I looked around on the internet for alternative cloud based services (which use much more powerful computers) that I could use with the Structure Sensor on my iPad mini. I experimented with Itseez3D and this produced better results. This service is also free (possibly only for the time being).

I also recently attended a two day one to one training session at XChange Training in London. My instructor Matthew O’Neill was very knowledgable on 3D software in general and Cinema4D (C4D) in particular. I showed him my work with the Structure Sensor and Itseez3D (the ‘Colin Blackmore’ head and shoulders model in my video). We discussed the software options for painting in 3D (not a 2D snapshot of the 3D model) and this limited the options considerably. I chose Cinema4D (C4D) for reasons I will explain later in another blog on 3D painting. He advised strongly not to try and learn to rig and animate a model as even an expert would take a dedicated week or more to produce 5 seconds of animation. This led to a discussion on ready made rigged models which I could pose using DAZ3D, POSER, and Turbosquid (more on this later in a future blog on 3D animation). I chose DAZ3D and POSER for ready made models for the 3D sculpture.

We discussed using C4D for making the sliced model to be input to a laser cutter. After showing me how this could be done in C4D I suggested that dedicated rather than generalised multi purpose software would be much easier to use. We looked at my suggestion of Autodesk 123D MAKE and he agreed.

This week I acquired a free download of DAZ3D and found that it had some limited posing capability. I also obtained a free download of Autodesk 123D MAKE. These were the versions for my MacBook Pro.

First steps using the chosen software

I decided that I would first experiment with a ready made model. Incorporating the scanning process on a life model in a studio is a step too far at this stage.

This is what I managed to produce after about an hour.

My first pose ever in Daz3D

My first pose ever in DAZ3D, which I then exported to 123D MAKE, and then to C4D

My first pose ever in 123D MAKE

My first pose ever in 123D MAKE

My first pose ever in C4D

My first pose ever in C4D – a rigged model

I was pretty pleased with what I achieved but there is a lot to learn to do this properly. I have also yet to try POSER to see what this software offers to see whether I can get a more refined result.

I am meeting Matthew Edwards, one of our Digital Technicians next Friday. I hope to discover where I can use a laser cutter and the format required for the input file needed to cut 47 sheets of MDF!!!

More Next Week.

First week experiences

It has been quite an exhilarating week. I attended the welcome event for the studio based fine art digital students and we all spent a lot of time chatting afterwards getting to know each other. I have also ‘met’ all my fellow online MA students twice now, and presented my recent work and study proposals (see my last video blog). Everyone is so open, easy to get along with and keen and Jonathan Kearney is I must say an impressive course leader and a very approachable individual. I could not have hoped for more and I feel very upbeat about my studies at UAL and Camberwell.

I must admit to having been a trifle apprehensive about presenting my study proposals as I was not sure how they would be received by my colleagues and particularly Jonathan. I need not have worried. Everyone was engaging and making helpful suggestions and good comments. It was great to see other student’s work and study proposals too.  They have quite a varied background and impressive plans. I can’t wait to see the remaining online students’ proposals next week.

It’s a pity we cannot see the studio based students’ study proposals too. At the first lecture yesterday on practice based research, I struck up a conversation afterwards with two Fine Art Digital studio based students and found that we have some interests in common that we agreed we would like to pursue together. It is a huge benefit to meet people with similar artistic passions and to be able to share our knowledge and research between us.

Yesterday I also had a chance to speak to Jonathan about his immediate reactions to my study proposals – “Terry you have about 5 MA’s there”. We both realise that I have quite an ambitious programme in mind and I now recognise that l will not be able to pursue all of them to the required depth. As I begin to research them all I can absolutely see his point. Nevertheless I was encouraged by his comment that I can save some of them for a future time and any work I do on projects discarded for my MA can be resumed after, so my research on these will not be wasted, and a period of experimentation is desirable in its own right anyway. His advice to now focus on one of my study areas and to prioritise my research and making to this is well taken.

So I will begin with making a 3D sculpture of the life model and painting this with light (projection mapping) as illustrated in my study proposal video. In my next blog I will talk about how I am going to do this and hopefully where I can use appropriate facilities and technical support within the University to make the sculpture.

IMG_6603 (1)

On 3 October I am attending an introductory online seminar given by Alex May (who has presented his original work on Projection Mapping at the V&A) and I will talk about this too in a follow up blog. Jonathan is interested in making contact with him too and hopefully we will have a full day on Projection Mapping during our Low Residency next term.

Later I will also post blogs on the research that I have done so far on 3D scanning, 3D Painting, Holographic (Peppers Ghost) Projection, and Viewer Interaction with hand gesture using Leap Motion. I am due to have a discussion next week with Matthew Edwards, one of our Digital Media Specialist Technicians who has offered to get involved where he can in these areas and point me to others where he can’t. I will follow this up next term if I have finished the piece I am now focusing on.

Finally, as I am about to start my formal research at the University I intend to read one of the books recommended in our first lecture. I am not sure which yet but it will also give me a chance to get to grips with library services.

Roll on Week 2.